Your SIM Sent A Text Message on iPhone? [5 Methods for You]
 Jerry Cook
- Updated on 2025-03-17 to Fix iPhone
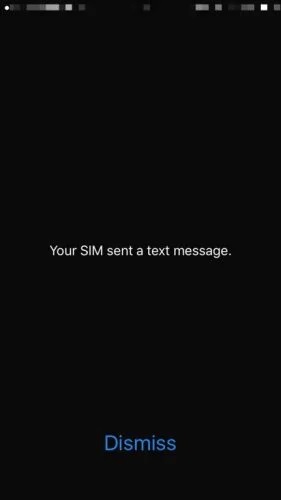
iPhones are incredible devices for swift and heavy performance, and the iOS user experience makes them an easy choice for users worldwide. But, this shouldn't imply that iPhones can’t face random bugs and errors. Many iPhone users have reported receiving the message "your sim sent a text message" after updating their iOS. So, if your iPhone keeps popping the error message, and you have no clue why this is occurring, we will help you. In this instructional guide, we will teach you what to do when you get this warning on your iPhone.
- Part 1: Why iPhone Says Your SIM Sent a Text Message?
- Part 2: 5 Methods to Fix "Your SIM Sent a Text Message" on iPhone
- Method 1: Close & Reopen iPhone
- Method 2: Check Carrier Settings Update
- Method 3: Reset Network Settings on iPhone
- Method 4: Repair iOS with Clicks without Data Loss
- Method 5: Remove & Reinsert SIM Card
- Part 3: FAQs about SIM Card Messages?
Part 1: Why iPhone Says Your SIM Sent a Text Message?
The thing going on in the background is your SIM card attempting to get an update from the SIM carrier. So each time the SIM card attempts to reach out to the server for an update, you'll see the " your sim sent a text message" notification on your screen.
If the issue persists more than once, it can show some problems with the update process. The issue can be either on your side or the carrier, yet since you can only handle your phone, we'll discuss techniques that will fix the error from your side.
Part 2: 5 Methods to Fix "Your SIM Sent a Text Message" on iPhone
Method 1: Close & Reopen iPhone
Your iPhone doesn't restart normally after updating the carrier settings. Restarting can give it a new beginning and may break the texting session of your SIM card and overcome your sim sent a text message boost mobile issue.
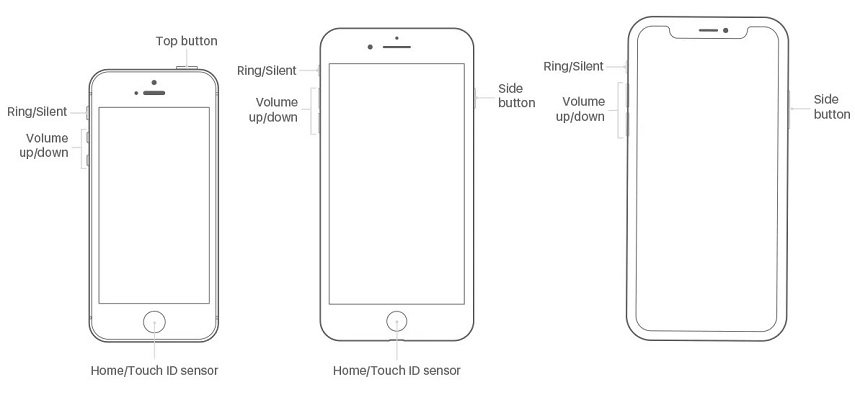
Press and hold the power button until the slider shows up to switch your iPhone off. Swipe the red slider from left to right to switch off your iPhone. Stand by around 30 seconds, then, at that point, press and hold the power button again to restart it.
In the absence of a Home button (for models above iPhone 8 Plus), press and hold the side button and a volume button until the slider appears. Swipe the slider as done in the previous case and wait until the phone turns off. Then, at that point, press and hold the side button again to start the device again.
Method 2: Check Carrier Settings Update
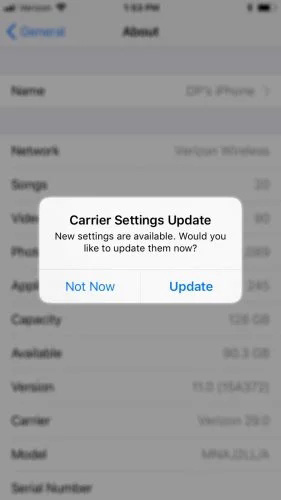
Your SIM may be sending programmed text messages on your iPhone to get to the update server. Thus, check any carrier update settings and install it on your iPhone using the method below:
- Step 1: Open your iPhone Settings and go to the "General" option. Then click on "About".
-
Step 2: Tap the message saying "Carrier Settings Update".

- Step 3: Stand by till it is done installing the updated carrier settings and restart your iPhone.
Presently, see whether you face the "your sim sent a text message iPhone 12" issue once more. Once more, assuming it shows up, continue with different techniques beneath.
Method 3: Reset Network Settings on iPhone
Resetting Network Settings will bring the phone settings to default. It includes all the Cellular, Bluetooth, Notifications, Wi-Fi, and VPN settings on your iPhone. Before progressing with the steps below, ensure you note down your login data like Wi-Fi name and other related Settings. That will fix the primary your sim sent a text message iPhone 12 error:
- Step 1: Open your iPhone Settings and tap on General.
- Step 2: Here, look down and go to the "Reset" option.
- Step 3: Click the "Reset Network Settings" option and enter your password when needed.
Step 4: Confirm your action from the popup, and your phone will reset all its Network Settings.

Method 4: Repair iOS with Clicks without Data Loss
Is your iPhone facing the "your sim sent a text message" issue? If so, worry not, since UltFone has you covered. UltFone is an iOS system repair tool fit for fixing 150+ iOS issues, such as being stuck on the Apple logo, dark screen, restart issue, and recovery or safe mode. It even helps you reset your iPhone/iPad without requiring a passcode.
UltFone works with each iOS update and device model, including the all-new iPhone 13 and iOS's 15th version. It is an inclusive tool for all your Apple needs.
Steps to Repair the iOS System without Data Loss:
-
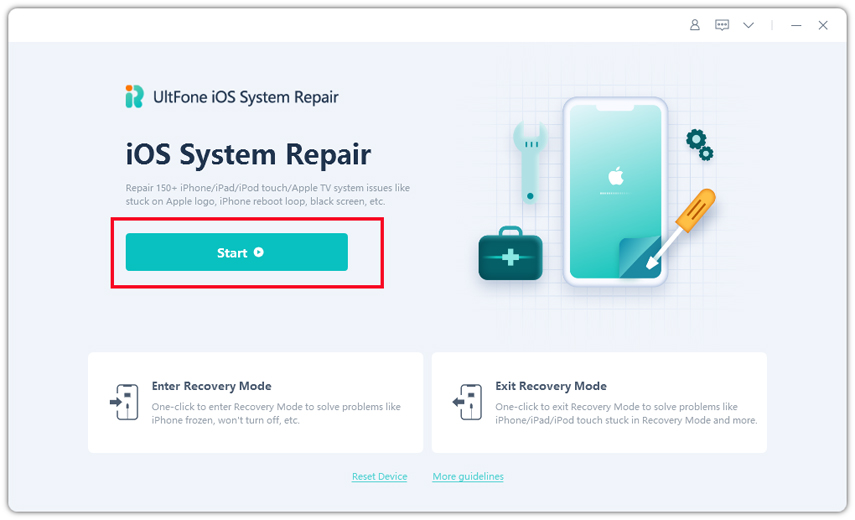
Step 1Download and Launch UltFone iOS System Repair
Install and open this software on your PC/Mac, and connect your iPhone or another portable device to the PC. By clicking the "Start" option, you will enter the iOS system fix option.
-
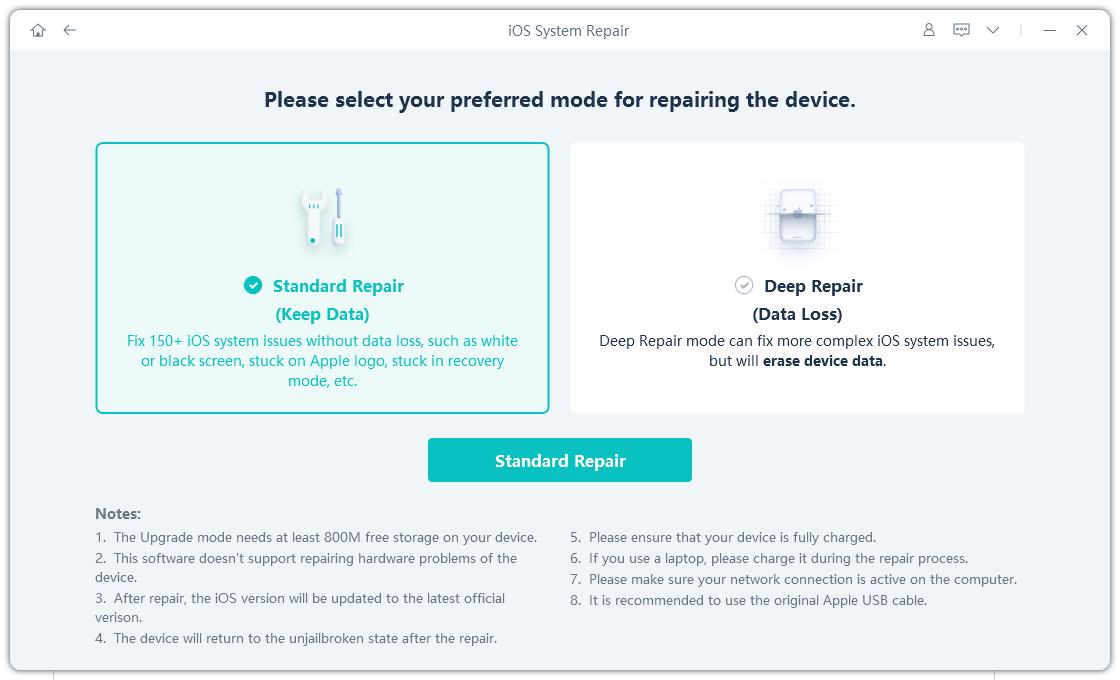
Step 2Select Standard Repair
On the next window, choose the "Standard Repair" option to resume.
Notes:
- If your iDevice failed to read, this tool will direct you to turn on Recovery or DFU mode.
- As we can see that there're two fix modes accessible: Standard Repair and Deep Repair. The main distinction between them is that with Standard Repair, there is no chance of data loss during the repair like the one during primary your sim sent a text message issue repair. Then again, the Deep Repair mode will clear off everything on your phone but can overcome severe issues that were not fixed by Standard Repair. If the Standard Repair mode doesn't solve your concern, pick the Deep Repair mode.
-
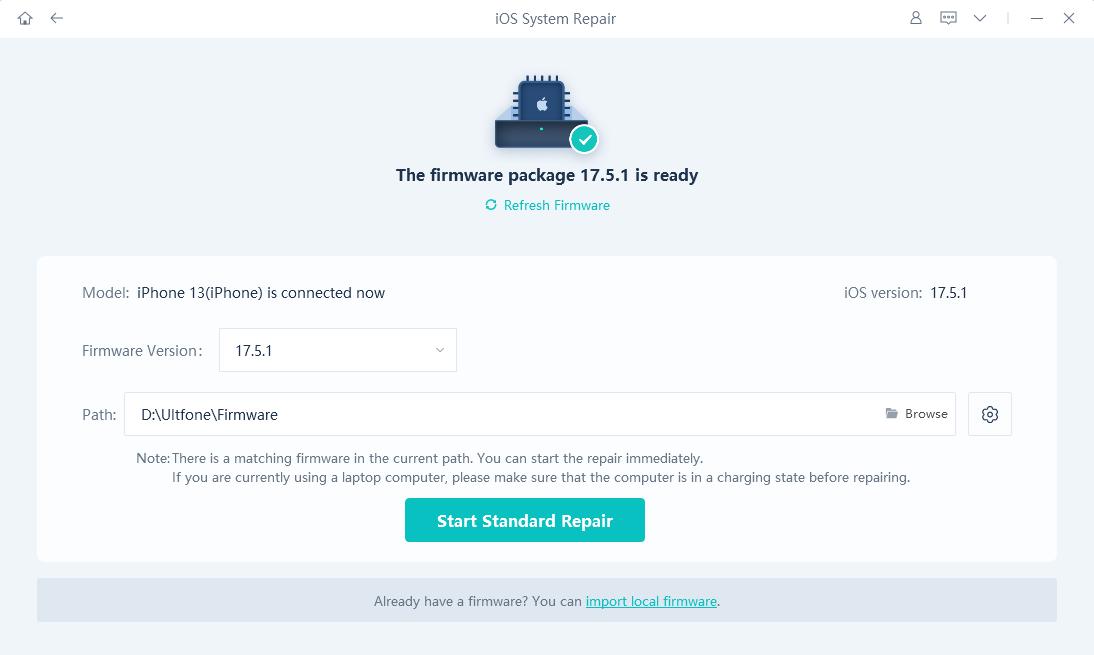
Step 3 Download Firmware Package
Before fixing the system, download the paired firmware package for your gadget by clicking the "Download" option. You can browse another location to store the downloaded firmware package.
-
Step 4 Start Repairing Operating System
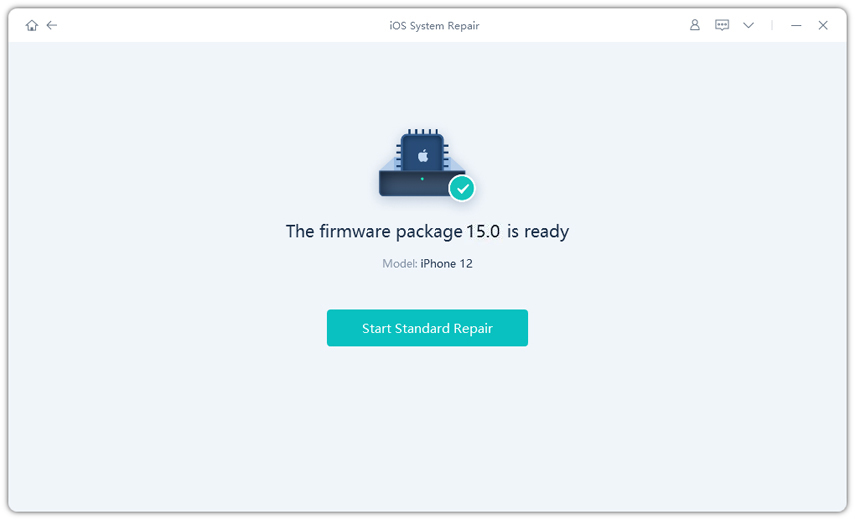
After having the firmware package on your device, click "Start Standard Repair" to fix the iOS issues on your iPhone. This process may take up a few minutes.
-
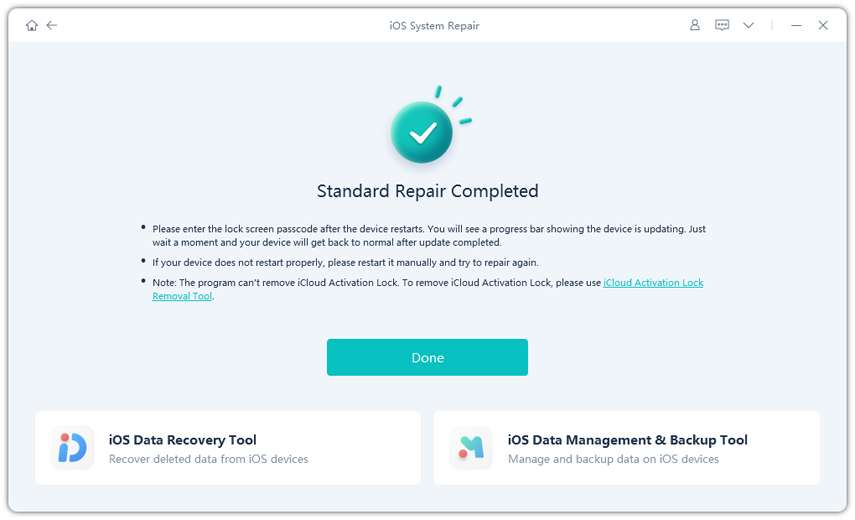
Step 5 Done with the iOS System Repair
After the repair is done, your iOS gadget will consequently reboot, and all that will fully recover.
Method 5: Remove & Reinsert SIM Card
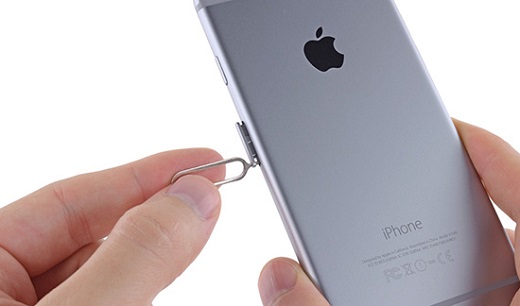
All iPhones have a SIM card tray for holding the card intact. The initial step to removing your SIM card is to open the SIM card tray from your iPhone using a sim ejector tool. There is a little paper cut embedded on the side of your phone that holds the SIM tray. Please wait for a moment and put the SIM tray, along with the SIM card, back in its place, and restart your iPhone.
Part 3: FAQs about SIM Card Messages?
1. Does SIM Card Store Text Message?
No. Text messages are only saved on your iPhone, not the SIM card. So, if somebody tries putting your SIM card into their device, they won't be able to see the text messages that you have previously gotten on your cellphone.
2. How to Read SIM Card Messages?
To find your messages, head into the application's Advanced Settings menu and scroll down till the end. There is currently a submenu called "Manage SIM card messages", which - basically for the present - allows you to see the text messages received on your SIM card and erase them.
3. Will Deleted Messages be stored on SIM Card?
No, the deleted messages are not stored on your SIM card. Your text messages are put away in the memory of your cellphone. The only data you could put away by you on the SIM card would be a portion of your contacts. It also requires your actions to make changes, delete or add a new entry inside your contacts/dialer application.
Conclusion
The " your sim sent a text message" is growing among iPhone users and needs to be dealt with care. We hope this comprehensive guide helped explain what does it mean when it says your sim sent a text message and provided solutions to get through. Moreover, using the UltFone iOS System Repair tool helps you tackle this issue using a few clicks. If you want to get rid of the problem right away, try using the UltFone iOS System Repair tool.


