Sovled: iPad Won't Connect to Wi-Fi After iPad OS 14 Update
 Jerry Cook
- Updated on 2021-01-07 to iPad
I downloaded iOS 14.3 to my iPad. I can NOT now connect to my WIFI. How can I reload 14.2?? I NEED WI-FI on my iPad.
No matter how many features are introduced via iOS 14 update but it is the most annoying update in Apple Inc. history. There are unlimited users asking questions like iPad won't connect to Wi-Fi after iOS 14 update, how to fix it. As if the battery draining and charging issues weren’t enough, Wi-Fi is also creating issues for the users.
So, in this guide, we are going to help the users to resolve the iOS 14 update issues on the iPad. Let’s begin.
- Part 1. Changes in iOS 14/iPad OS 14 Wi-Fi Settings
- Part 2. Common Tips to Fix iPad Won't Connect to Wi-Fi after iPad OS 14 Update
- Part 3. Why Won't My iPad Connect To Wi-Fi Even Trying All Regular Tips?
Part 1. Changes in iOS 14/iPad OS 14 Wi-Fi Settings
Before we get down to the main business of fixing the issues, let’s gain some insight into the changes in the settings that might be resulting in the problem. As we all know, the interface will have so many new features after the iOS 14 update and Wi-Fi is a part of these changes.
If you don’t adjust the settings after the update, then your iPad will not connect to Wi-Fi. Some of the changes that are introduced with the new update include:
- When you open Wi-Fi Settings in iOS 14, you will see three new options.
- The Choose a Network option is replaced with two new options, i.e. My Networks that contain recently connected networks, and Other Networks that has a list of available Wi-Fi networks.
- The Ask to Join Networks section now has three settings options, i.e. Off, Notify, and Ask.
- An “Auto Join” feature is also added for Hotspot to check for available nearby networks and connect to them if possible.
- New Low Data Mode is also added for iOS 14 and iPadOS that ensure that your iPhone keeps the data usage low.

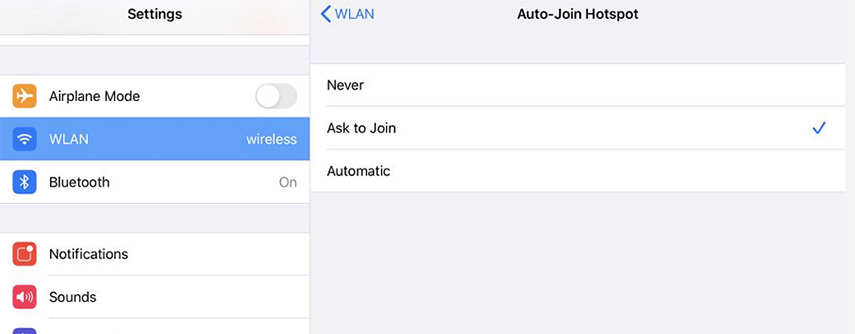
All these new settings mean that you have to take a few minutes and modify them manually to your requirements. If you don’t alter the settings, then it is obvious that you will experience various issues.
Part 2. Common Tips to Fix iPad Won't Connect to Wi-Fi after iPad OS 14 Update
To help you resolve the problems with your Wi-Fi connection, we have gathered some common tips for you. Take a look and hopefully one of them will fix the Wi-Fi connection problem.
Tip 1. Make Sure That Your Router Is On And You Are Within Range
If your iPad can't connect to Wi-Fi, there is a slight chance that the primary issue is your device being out of range. Check whether the Router is on or off and make sure that you are in the proximity of the device. If you can’t even get a signal, then it is obvious that you won’t be able to connect to the network as well.
Tip 2. Toggle Airplane Mode On And Off
Some people think that using Airplane mode is just a trick. But as you turn the Airplane Mode on, the radio frequency of your signal transmissions turn off completely. So, it is an effective method to try. If you are requesting a solution stating “my iPad won't connect to Wi-Fi”, then use this simple trick to fix the problem.
Step 1: Open the Control Center and tap on the Airplane icon to turn on the mode.
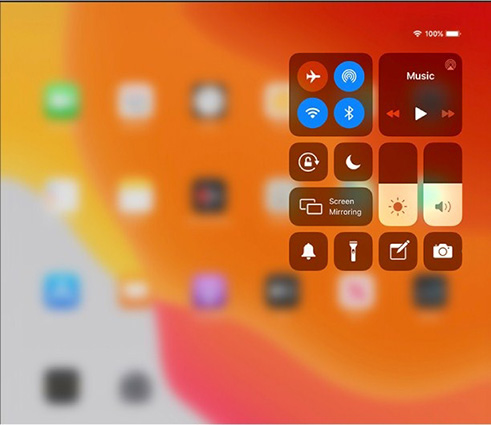
Step 2: Restart your iPad and then turn off the mode.
If the simple restart didn’t have any effect on the problem, then you can also try force restart to see if the problem gets fixed.
Tip 3. Toggle Wi-Fi off And On
Turning the Wi-Fi off and on again can rectify the minor errors effectively including the after update bugs. So, if your iPad cannot connect to Wi-Fi, then simply give quick reset to the Wi-Fi following the steps below:
Step 1: Open Settings and click on Wi-Fi settings. Toggle the bar to turn off the Wi-Fi and exit the app.

Step 2: Now, restart your device and again open settings to switch the Wi-Fi back on.
You can do the same via Control Center as well. After the restart, you will be able to connect to the Wi-Fi network of your choice easily.
Tip 4. Restart iPad
If you are tired of mentioning “my iPad will not connect to Wi-Fi” on the forum sites and nothing is working, then you need to restart your iPad. There is a possibility that the device restart after the iPadOS 14 updates didn’t finish properly. So, restarting it might fix the issues.
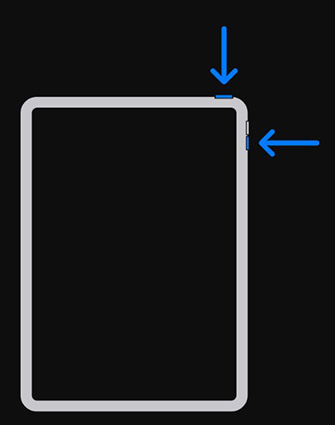
To restart the iPad with Face ID, press and hold any of the Volume button and the Power button. Hold the buttons until the slider appears on the screen. Then drag the slider to the right to switch it off.
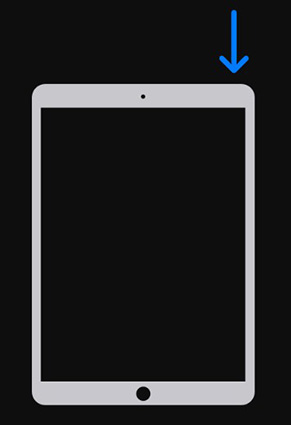
To restart the iPad with Home Button, you need to hold the top button and wait as the slider appears on the screen. Drag the slider and turn off your iPad.
You can use the Power button to turn on the iPad and see if the problem is fixed or not.
Tip 5. Forget This Network And Rejoin
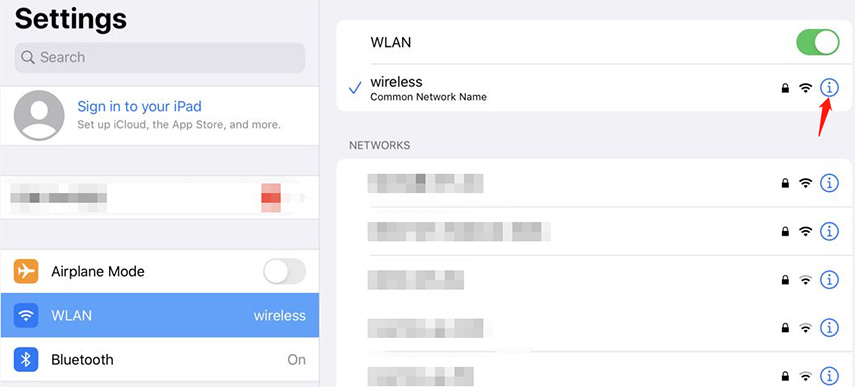
Step 1: Open the Wi-Fi settings and you will see the network list on the screen. Click on the “i” icon that stands for “More Info”.
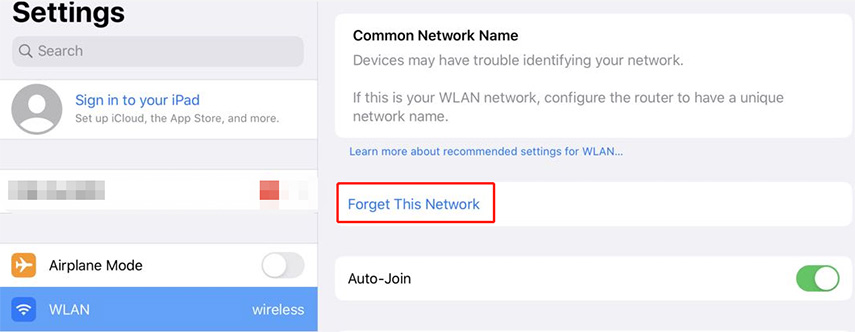
Step 2: Click on the Forget This Network option and confirm to forget the network. Restart your device and clear the device caches.
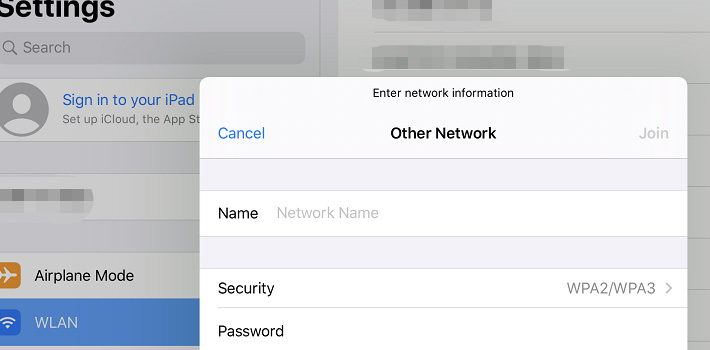
Step 3: Reopen the Settings and find the recent network in the Other Networks section. Tap on the network and enter the password to join the network again.
This will be a plausible solution for the connection problem.
Tip 6. Update iPad to Latest iPadOS Version
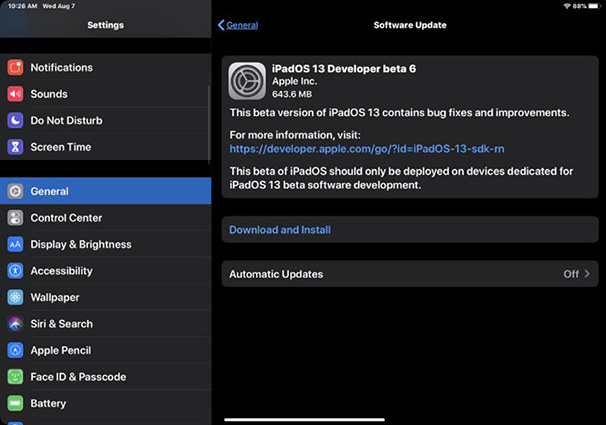
Apple Inc. is trying to fix the bugs in the new iOS 14 updates for a while now. Whether your iPad won't connect to public Wi-Fi or personal Wi-Fi, it might be happening due to the bugs present in the unfixed version. So, open Settings, get to the Software Update section and click on the Download and Install update option to get the latest bug-free version of iOS 14.
Part 3. Why Won't My iPad Connect To Wi-Fi Even Trying All Regular Tips?
Generally, we would say that your question “why won't my iPad connect to Wi-Fi” can be answered with the above tips. But if the tips don’t work out well for you, then don’t panic. We still have some other tips that might help you resolve the issue.
Tip 7. Reset iPad Network Settings
During the update, various new settings are installed in the device that raises some conflicts. When the iPad mini won't connect to Wi-Fi, it might be due to such conflicts. These problems can be resolved with a network settings reset. To do this, follow the steps below:
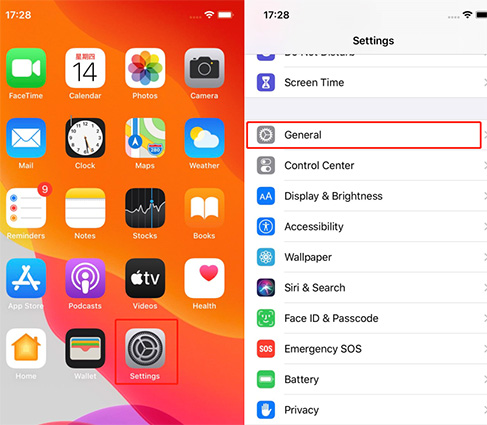
Step 1: Open Settings and click on the General Settings. Scroll down to find the Reset option and select the Reset Network Settings option.
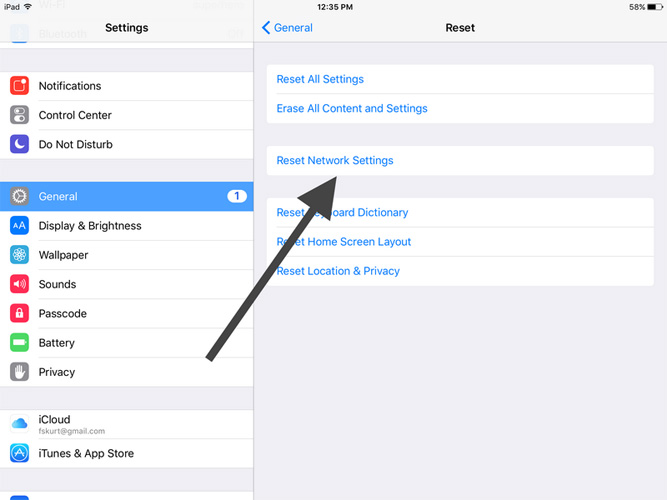
Step 2: Confirm the action and enter your device passcode. Wait as the settings reset and you can use your device again.
After the reset, your device will be able to connect to Wi-Fi and you will have internet access.
Tip 8. Change DNS of the Wi-Fi Network
Along with the other options in the Wi-Fi settings, the DNS settings also get modified after the update. So, if your iPad cannot connect to Wi-Fi & unable to join the network; then try to change the DNS configuration. To do this, follow the steps below:
Step 1: Open Wi-Fi settings and click on the “More Info” icon. You will find the Configure DNS option on the menu.
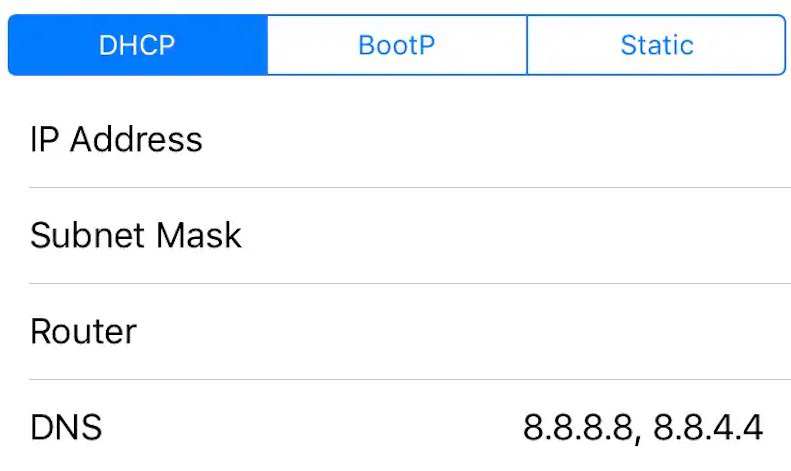
Step 2: Click on the option and switch the Automatic settings to Manual. Delete the existing server and click on the “Add Server” option and type “8.8.4.4” or “8.8.8.8” in the address and save it.
Tip 9. Reset All Settings
One of the last resorts if the iPad will not connect to Wi-Fi after the update is the complete settings reset. The iPadOS 14 updates might have affected some underlying settings that are interfering with the settings. To reset the settings, the steps are simple:
Step 1: Open General Settings and select the Reset menu. Choose the Reset All Settings option and you will be prompted to enter your device passcode.
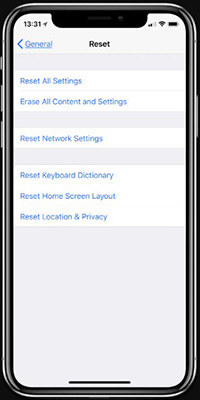
Confirm the action and your device will get back to the default settings. As your data is safe, you only have to spend some time in customizing the settings according to your requirements.
Tip 10. Repair iPad System To Fix iPad Can't Connect to Wi-Fi after iOS 14 Update
If none of the above methods tend to work out, then we need to use a reliable third-party tool to resolve the issue. Whether your iPad won't connect to Wi-Fi after iOS 14 update or there is some other issue with it, UltFone iOS System Repair tool can fix everything with just one click. This tool specializes in fixing different kinds of software issues in iOS devices including Wi-Fi, Apple icon stuck, recovery mode stuck, reboot loop, black screen issue, etc.
To use the tool, we first have to download it on our system. Once the software is ready for use, we can run it by following the steps below:
- Step 1 Launch the program and click on the Repair Operating System option to fix all iOS-related issues. Now connect your iPad with the system and the software will detect it.
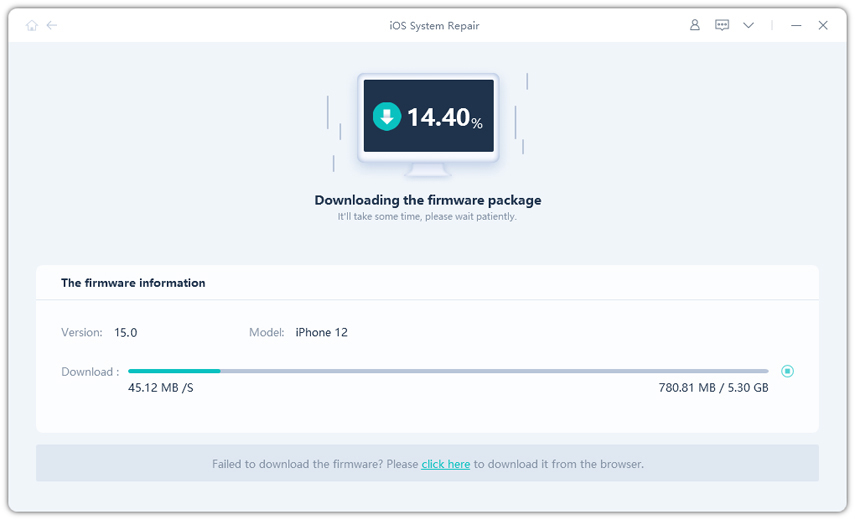
- Step 2 You will be prompted to download a firmware package file that is suitable for your device software. Wait as the download finishes.
- Step 3 Once the software is ready for the repair, click on the “Repair Now” button and the process will start. Within a few minutes, the problem will be resolved and your iPad will reboot.
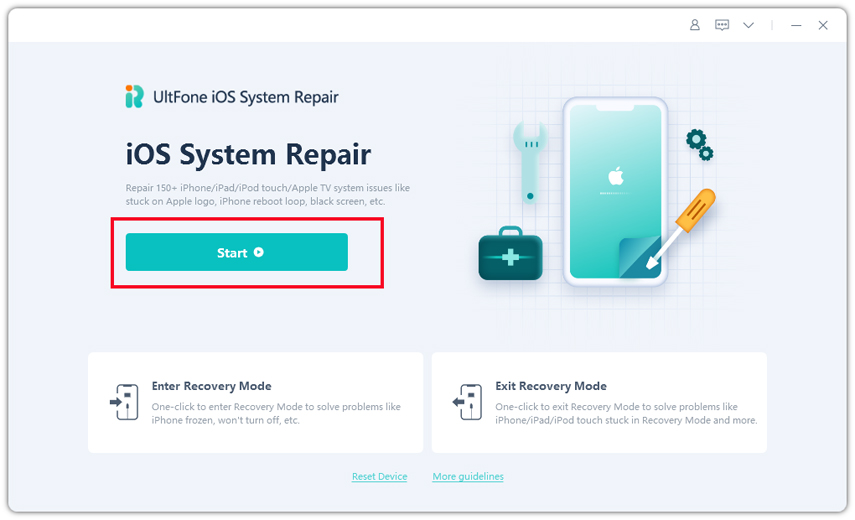
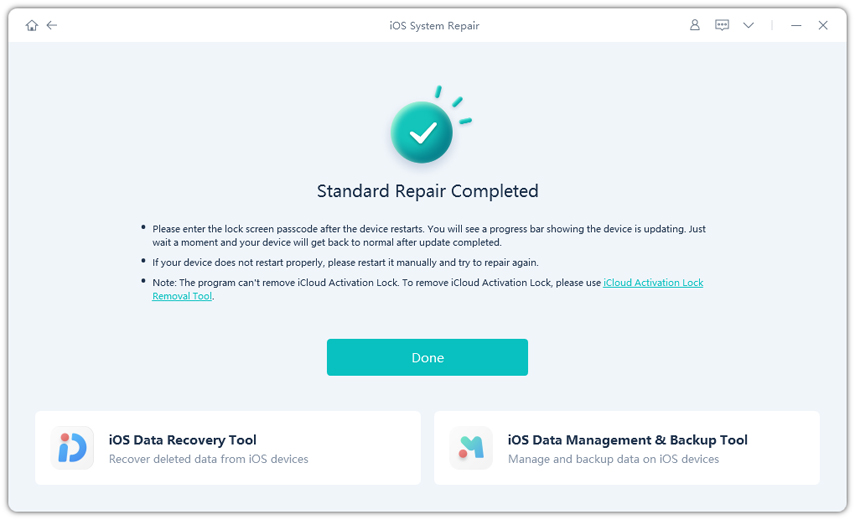
After the reboot, you will be able to use Wi-Fi and the device performance also improves without any data loss. So, you get to fix your device without any setback.
Conclusion
Now you know that if the iPad can't connect to Wi-Fi, there are lots of solutions that you can try. But we recommend using UltFone iOS System Repair tool as it is a guaranteed fix for all types of software issues. You don’t have to hope for the best when you are trying the fixes as you know that there is a tool that is 100% safe and effective. So, suggest the software to your friends and family as well and help them to fix the iOS 14 update issues as well.


