Tips of Recover Data from Dead Hard Drive
 Jerry Cook
- Updated on 2020-10-14 to Data Recovery
A hard drive is a secondary storage device in computer whose purpose is to store the data permanently. The data could be pictures, text documents, music, videos or the files for operating systems and software programs that run on your PC. These drives are secondary as the primary memory device is RAM (Random Access Memory). A hard drive is a non-volatile computer storage which implies data is retained even when the PC is off. But there are circumstances where users experience data loss. For instance, virus attack, accidental deletion, physical damage, water exposure etc.
Well! We are here to help users with their concern on how to recover data from broken hard drive or a dead hard drive. In case you are one of those users, please read this article carefully as we are going to tell how you can do dead hard drive recovery on Mac or Windows.
- Part 1: How to Recover Data from A Dead Hard Drive on Mac and Windows
- Part 2: Something You Should Know After Dead Hard Drive Recovery
Part 1: How to Recover Data from A Dead Hard Drive on Mac and Windows
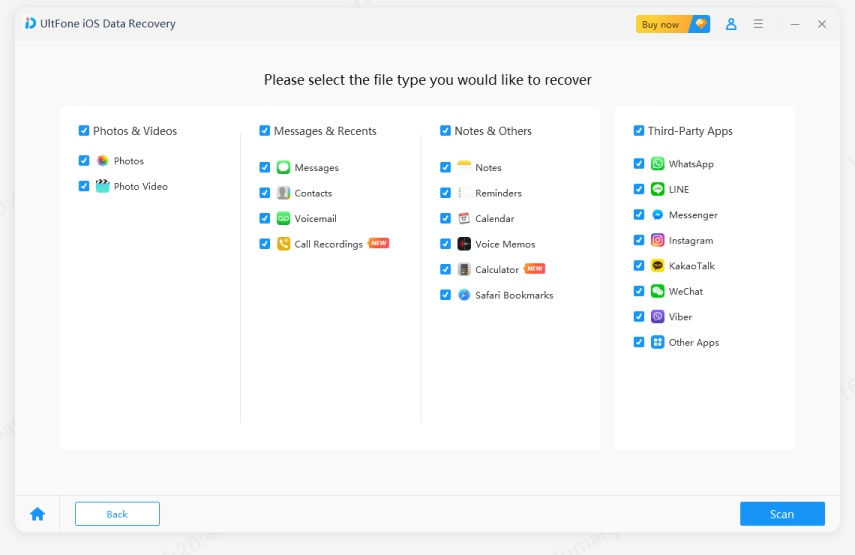
Now, coming to the topic, to go for dead hard drive recovery, we would like to recommend you UltFone Windows Data Recovery. As the name of the program suggests, it can help you recover data from hard drive dead Mac pro or dead computer/laptop. The tool promises highest data recovery rate and is perfectly secure to use. Let us understand how you can recover files from dead hard drive using this tool.
- Step 1 Download Any Data Recovery and install it on your computer.
- Step 2 Connect the external hard drive to PC.
-
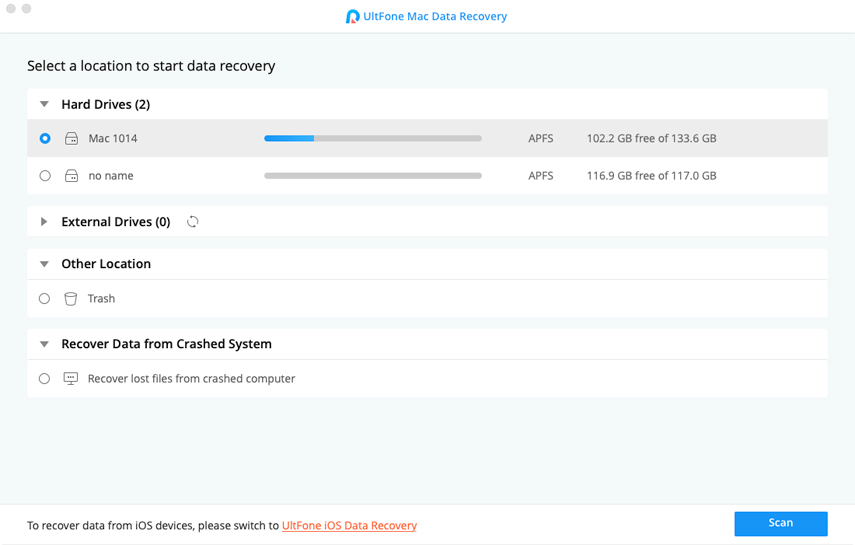
Step 3 Launch the product and select the location where your hard disk. After you find it click "Scan" to scan the files saved in hard drive.

-
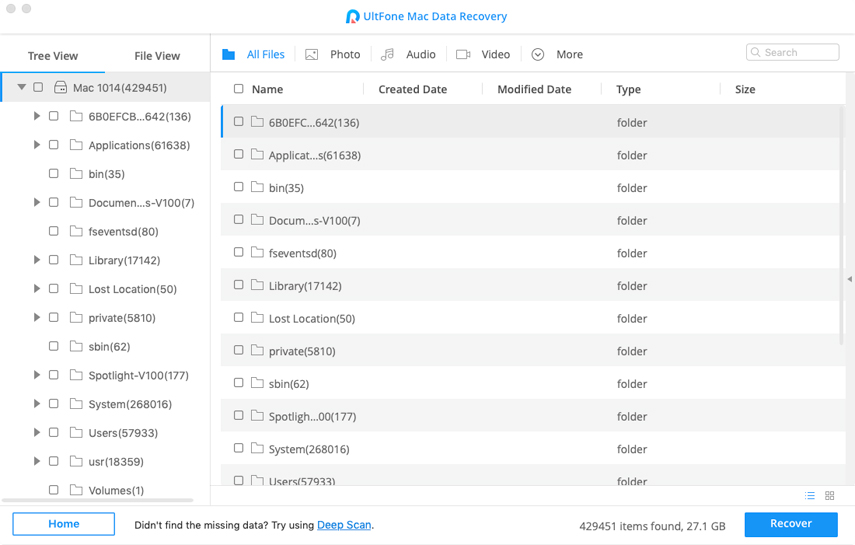
Step 4 Waiting for the scanning process, generally the processing time depends on files size. the scan is completed, all files found are displayed in file view by default.

-
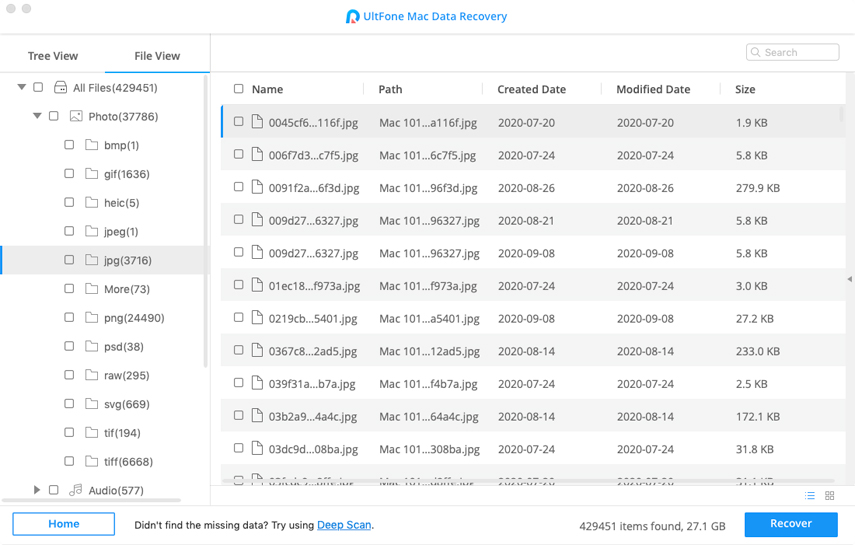
Step 5 When you expand a category on left column, you will be able to preview all items in details including name, path, created date, modified date, size, etc.

-
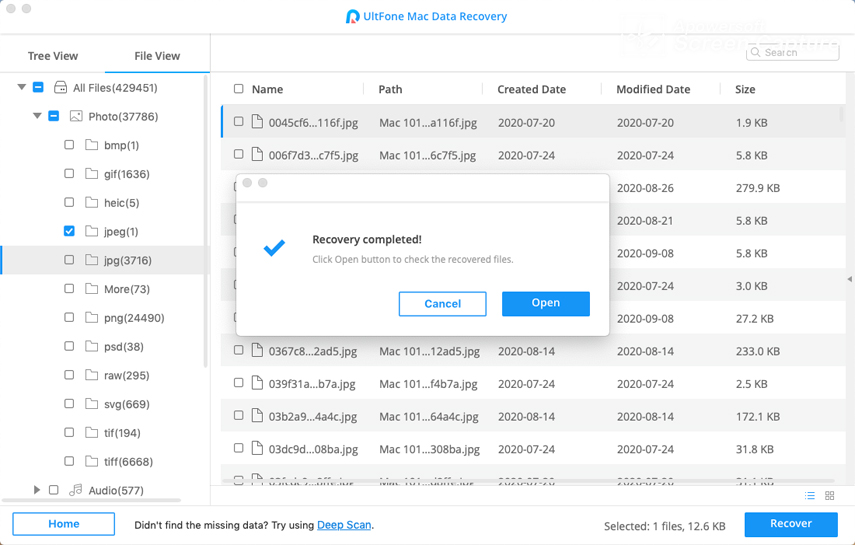
Step 6 Select your Mac lost files and click Recover button, a prompt pops up for you to select a save -up path. It is highly recommended not restoring deleted files to original partition where you lost them.

Windows and mac use the same steps, here take the Mac version for example. If your Mac is macOS High Sierra and later, you will need to disable SIP first to allow access of Mac files. There is an onscreen prompts for your reference.
As we all know, the functionalities of Mac and Windows operating system vary too much extent. And same is the case with hard drive both the computers carry. The two systems differ in terms of the file systems used for storage. The Mac makes use of HFS, HFS+ or HFSX file systems, whereas Windows employs FAT32 or NTFS. In addition, a Mac hard drive can be physically connected to the Windows computer, however, it is not able to read it sans any third-party software. One needs to install one to carry out the reading of the drive-in Windows PC. So it is very important to choose a product that supports win and mac.
Part 2: Something You Should Know After Dead Hard Drive Recovery
1. How to manage hard disk
In order manage your hard disk you need to access the Disk Management console. For which, you are required to login to the Administrator account of your Windows PC. Then follow the below mentioned steps:
-
1. Hit Windows + R key combination to launch Run box and key in "compmgmt.msc" followed by Enter.

- 2. Alternatively, you can simply hit the “Manage” option by right-clicking over the "This PC/My Computer" icon.
-
3. Now, opt for the "Disk Management" option available in the console tree. The Disk Management window will now show up on your screen.

2. How to use hard disk partition
Here we'll get to understand about how to partition your hard disk drive properly. Follow the streak of steps carefully or else, you may end up losing your entire data on your hard disk.
-
1. Hit the "Search" icon in the taskbar and punch in "partition". Now, opt for "Create and format hard disk partitions".

-
2. Then, you need to opt for a disk drive that has free space available out of which you'll be making a new partition. Right on that drive and opt for "Shrink Volume".

- 3. Now, key in the size you wish to shrink out the disk drive by and hit on "Shrink".
-
4. Lastly, you will see the unallocated space on your hard disk over the disk management window. Right click it over and select "New Simple Volume".

Conclusion
We are just going to clonclude the topic here. By reading this article carefully, you will get to know how easy for corrupted hard drive recovery by using data recovery software. With Any Data Recovery, dead hard drive recovery is no more a nightmare. We hope you liked the post and would be glad if you share your views or queries with us. Thanks!

