How to Use iCloud DNS Bypass Server to Bypass iCloud Activation
 Jerry Cook
- Updated on 2022-02-11 to iCloud
There are many scenarios when you find yourself in the need of using the iCloud DNS bypass method. For instance, you have lately bought a second-hand iOS device with an iCloud activation lock enabled or you have forgotten your iCloud password. In either case, you won’t be able to use the iCloud locked device. Of course, you can take the assistance of Apple customer support. But, they will ask you lots of questions and they may request the original iOS device payment receipt. In all, if you consider taking the help of Apple customer support, the process is going to be very time-consuming.
So, if you want a quick solution in order to gain access to the locked iOS device, then you can rely on the iCloud DNS bypass method. Continue reading to know all about bypassing iCloud activation using the DNS server and its best alternative out there.
- Part 1: Frequently Asked Questions of Using iCloud DNS Bypass Server to Bypass iCloud Activation
- Part 2: How to Bypass iCloud Activation Lock with iCloud DNS Bypass Server?
- Part 3: Alternative Method to Remove iCloud Lock when iCloud DNS Bypass Not Working
Part 1: Frequently Asked Questions of Using iCloud DNS Bypass Server to Bypass iCloud Activation
1. What is iCloud DNS Bypass?
When you set up a new iPhone/iPad or re-set it up after performing a factory restore, then the device will send an activation request to the Apple Server. Apple processes the received request and inspects the status of the device. If the Find My iPhone is “turned on” on the device, then the iCloud Activation Lock screen will appear. Here, you’ll have to provide your iCloud account login credentials to access the device.
When you set up a new iPhone/iPad or re-set it up after performing a factory restore, then the device will send an activation request to the Apple Server. Apple processes the received request and inspects the status of the device. If the Find My iPhone is “turned on” on the device, then the iCloud Activation Lock screen will appear. Here, you’ll have to provide your iCloud account login credentials to access the device.
2. The Advantages of iCloud DNS Bypass
- You can do it with ease in your iPhone/iPad’s Wi-Fi settings and no software installation is needed.
- Once the iPhone/iPad is DNS activated, you can access the locked device and use some applications like the camera, play games, browser, etc.
- This method is entirely free, no need to spend any buck for the service.
3. The Disadvantages of iCloud DNS Bypass
- This method is a hack to gain access to an iCloud locked device and not a permanent unlock solution.
- There is no guarantee that it is going to work to unlock your iPhone/iPad.
- DNS activated doesn’t let you enjoy all the features of the device.
- This method doesn’t work for all iOS devices.
Part 2: How to Bypass iCloud Activation Lock with DNS Server?
If you want to give a try to DNS bypass iCloud activation lock method, then follow the below steps on your iCloud locked device:
- Step 1: First of all, ensure that you have inserted the SIM card on your device.
- Step 2: Now, go through the device’s setup procedure and select your country & language.
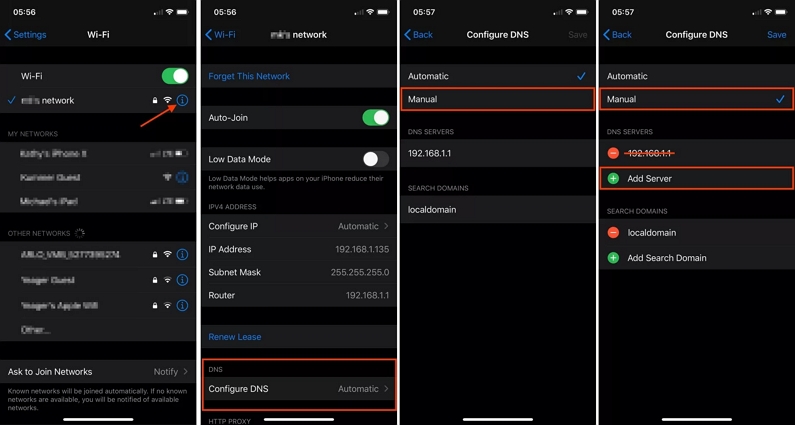
- Step 3: You’ll be now on the Wi-Fi Settings screen, connect to a reliable Wi-Fi connection and you’ll see the “i” icon along with the Wi-Fi network. If you don’t see that icon, then tap on the “Home button”>” More Wi-Fi settings”.
-
Step 4: Navigate to the Wi-Fi connection’s setting and choose “Forget this Network”. Tap on the “i” icon, you’ll see the option to enter a DNS server. From the below list, select an IP address in accordable with your location and enter it.
America: 104.154.51.7
Asia: 104.155.220.58
South America: 35.199.88.219
Australia and Oceania: 35.189.47.23
Europe: 104.155.28.90
Other continents: 78.100.17.60
-
Step 5: Tap on the “Back” and then select your Wi-Fi connection from the available list. Now, enter the passcode. Tap the “Back” option instead of “Next”, you’ll be on the iCloud bypass screen.

Once the iCloud activation is bypassed, you’ll be able to access the locked device.
Part 3: Alternative Method to Remove iCloud Lock when iCloud DNS Bypass Not Working
Is iCloud DNS bypass not working for you? As we mentioned before, the iCloud DNS method doesn’t work for all iOS devices and that’s when you need its alternative solution. UltFone Activation Unlocker comes in very handy when the DNS bypass iCloud method doesn’t work. This software is quite popular among iOS users who find yourself in the need for bypassing the iCloud activation lock. It is specially designed to help users bypass the activation lock without much hassle.
The software has many advantages over the iCloud DNS bypass method, so let’s have a look at them:
- Bypass activation lock without Apple ID.
- Your device won’t be locked or tracked by the previous iCloud account.
- Supports from iPhone 5s to iPhone X, and iOS 14 is supported.
- Simple operation with 100% success rate.
Step-by-step Guide on How to Use UltFone Activation Unlocker:
-
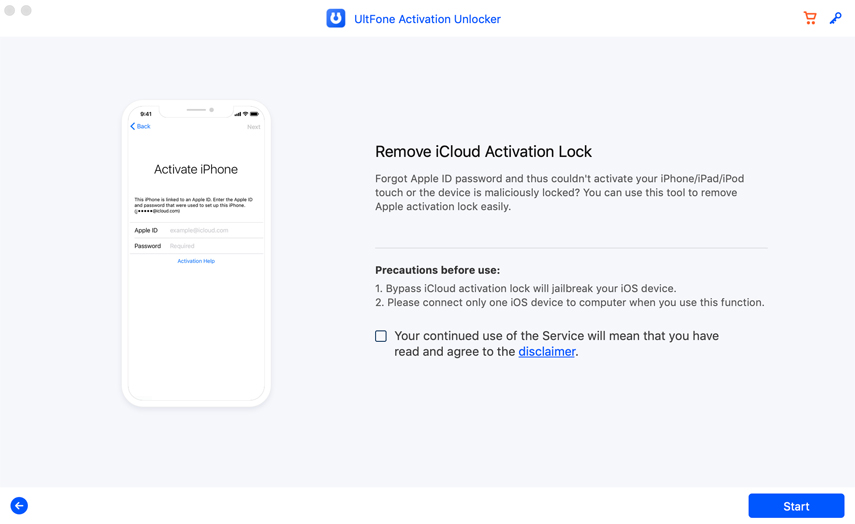
Step 1 Open the software on your computer and hit on the Start button.

-
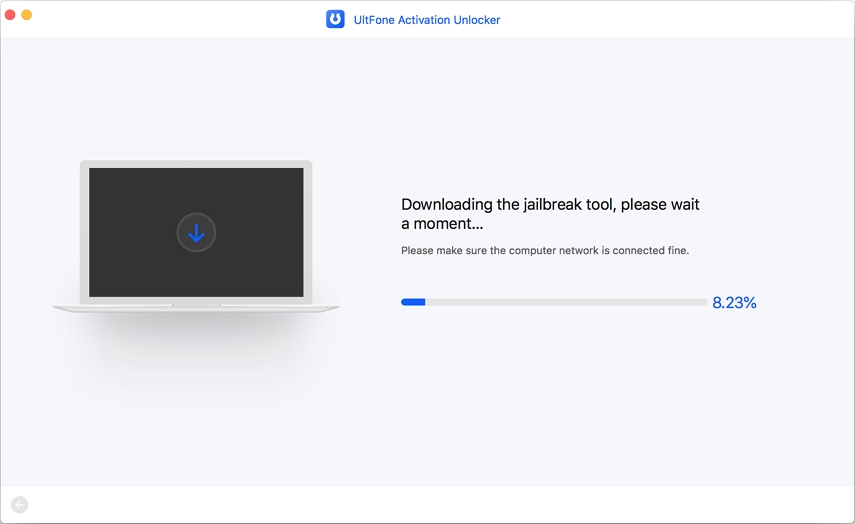
Step 2 Connect your device to the computer and let the software download the jailbreak tool.

-
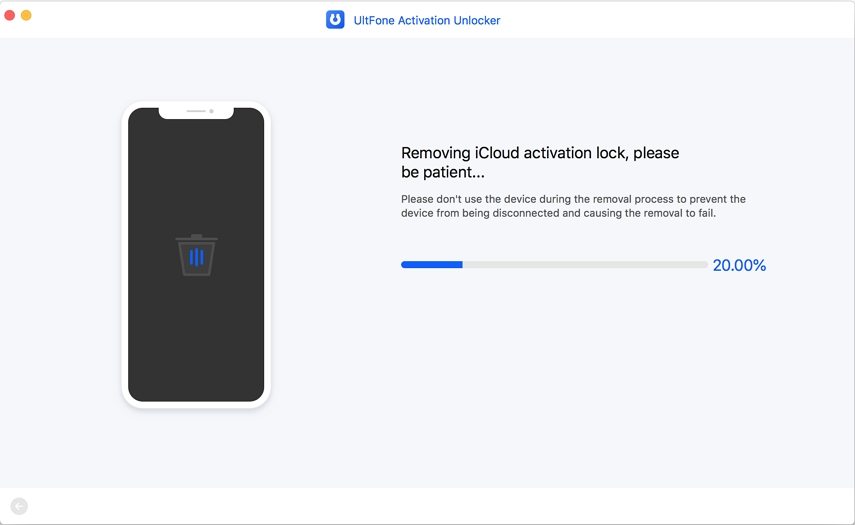
Step 3 Finally, hit on the “Start Remove” button after confirming your device’s information and that’s it.

In a while, the software will remove the activation lock and you’ll be able to access your device and enjoy its features.
The Bottom Line
That’s all on how to DNS server to bypass iCloud activation. If iCloud DNS bypass method doesn’t work for you, then turn to UltFone Activation Unlocker. This software is far better than DNS way as it helps to do the job with ease and on top of all, suitable for almost every iOS device and version.

