How to Transfer Pictures from Old iPhone to New iPhone 13
 Jerry Cook
- Updated on 2025-06-04 to Transfer
As soon as anyone buys a new iPhone 13, the first task that they embark on is transferring their photos from the old device to the new one. However, when you have thousands of photos to deal with, it can become quite a strenuous task to transfer photos to new iPhone. Fortunately, there are a few solutions that can help you make this process less challenging.
In today’s guide, we are going to share different solutions on how to transfer photos from iPhone to iPhone 13 more effectively. So, if you have also purchased the latest iPhone 13 and have been setting it up for a while, continue reading. This article will help you make the photo transfer process way smoother.
- Way 1. Transfer Photos from iPhone to iPhone with UltFone iOS Data Manager
- Way 2. Transfer Photos from Old iPhone to New iPhone 13 with iCloud
- Way 3. Transfer Photos from Old iPhone to New iPhone 13 with iTunes
- Way 4. Transfer Photos from iPhone to iPhone 13 Wirelessly with AirDrop
Way 1. Transfer Photos from iPhone to iPhone with UltFone iOS Data Manager
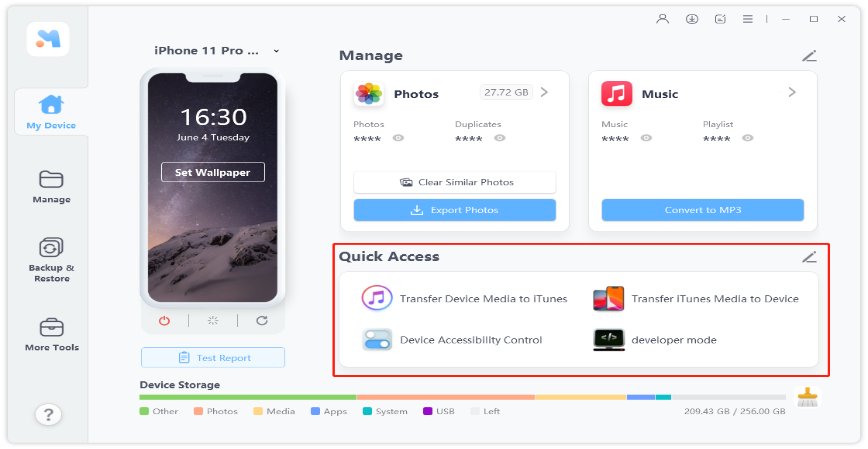
If you are looking for a hassle-free way to transfer pictures from iPhone to iPhone 13, we recommend using UltFone iOS Data Manager. It’s an all-in-one solution that you can use to backup, restore, transfer, and manage data on any iDevice without relying on iCloud or iTunes.
One of the major advantages of choosing UltFone iOS Data Manager over traditional data transfer methods is that it even allows selective data transfer. You can manually choose the files that you want to transfer to the new device. This way your new iPhone 13 won’t get cluttered with unnecessary images and you’ll be able to keep it junk-free easily.
Here are a few factors why UltFone iOS Data Manager is one of the best tools to transfer photos from iPhone to iPhone 13.
- Export photos from any iPhone/iPad to a computer with a single click.
- Selectively back up and restore iOS data on and iPhone/iPad/iPod.
- Selectively extract and restore iTunes/iCloud backup data.
- Compatible with the latest iOS 15 and iPhone 13 series.
So, here’s the detailed step-by-step process on how to transfer photos to new iphone using UltFone iOS Data manager.
- Step 1 Install and launch UltFone iOS Data Manager on your computer and click “Backup and Restore” on its home screen.
-
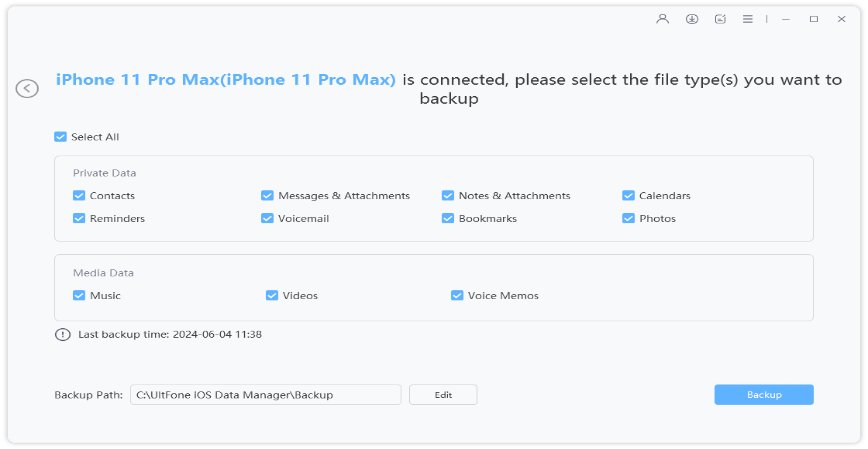
Step 2Now, connect your old iPhone to the system using a lightning cable. Once the device gets detected, you’ll be asked to select the files that you want to back up. By default, all the data types would be selected. But, you can also uncheck unnecessary files from the list. Basically, click “Photos” here to get it transferred.

-
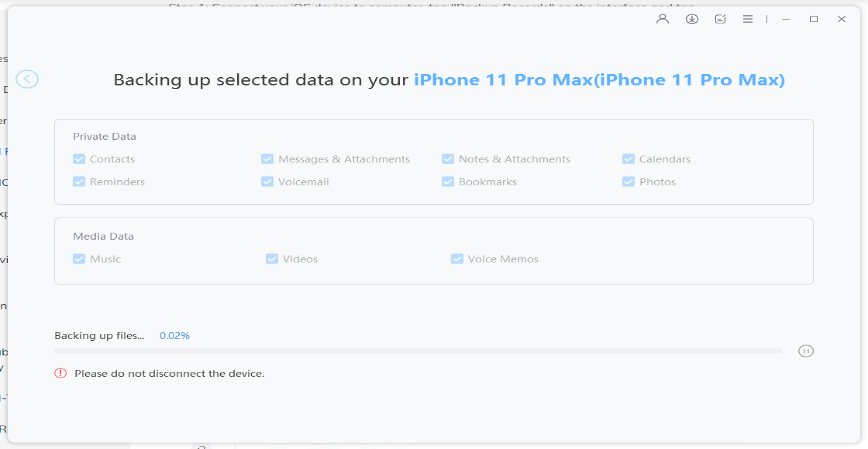
Step 3Then, click “Backup” and the tool will instantly initiate backing up data from your old iPhone. Wait for a few seconds as this process may take a while to complete.

-
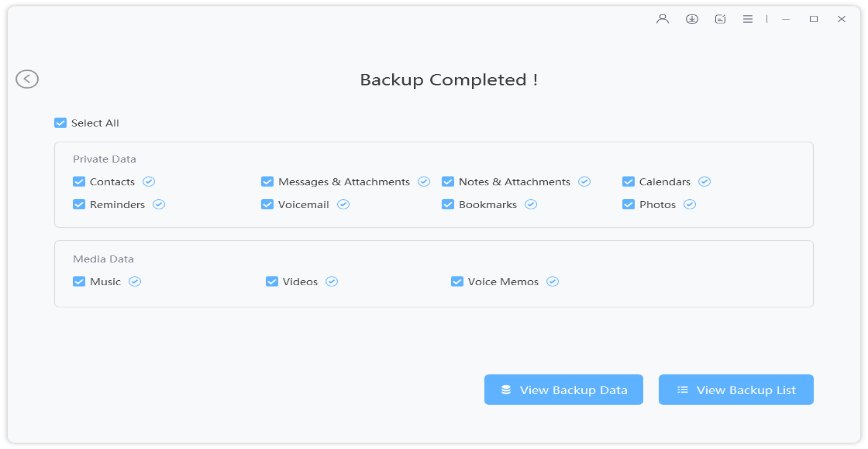
Step 4 After the backup process completes, click the “View Backup” button to ensure that it involves all the important files.

- Step 5 At this point, you can proceed towards restoring the backed-up files on the new iPhone 13. To do this, simply disconnect the old iPhone connect thenew iPhone 13 to the computer.
-
Step 6Again, launch UltFone iOS Data Manager and switch to the “Backup and Restore” tab. Then, tap the “To view or restore previous backup files” button at the bottom-left corner.

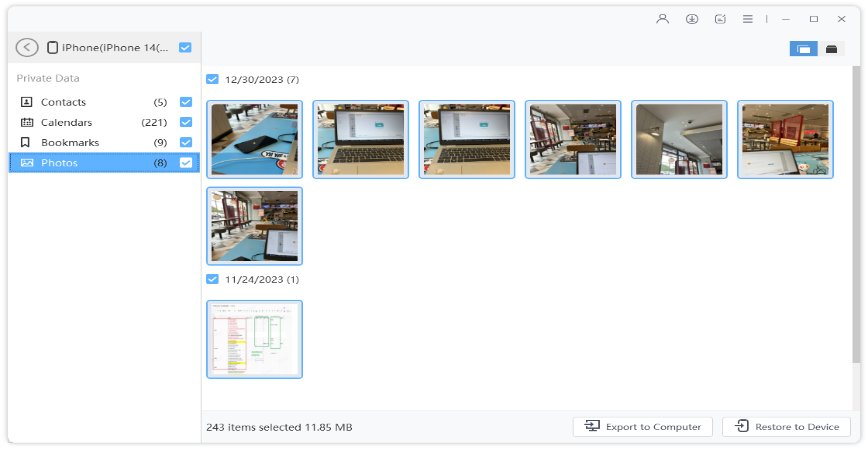
- Step 7 You’ll see a list of all the backups that you’ve created using UltFone iOS Data Manager. Select the latest backup file and tap “View”.
-
Step 8Select all your wanted data and simply click the “Restore to Device” button to restore all the data on your iPhone 13.

That’s how to transfer photos from old iPhone to new iPhone 13 using UltFone iOS Data Manager.
Way 2: Transfer Photos from Old iPhone to New iPhone 13 with iCloud
Another way to transfer photos to the new iPhone is through iCloud. The majority of iOS users have a habit of backing up their iPhone’s data. If you’re one of them, you won’t need a third-party tool to restore your files on the new iPhone 13. All you have to do is log in with the iCloud credentials and restore all the data with a single click.
The only downside of using this solution is that it will restore all the files that are included in the backup. You don’t have the option to manually select the files and all your current data on your iPhone 13 will be overwritten.
Follow these steps to transfer photos from iPhone to iPhone wirelessly using the iCloud backup.
Step 1: First of all, grab your old iPhone and open the “Settings” app. Tap the iCloud tab, followed by Photos, and toggle the switch next to the “iCloud Photo Library” option.

- Step 2: On your new iPhone 13, you’ll again have to follow the same process to enable the “iCloud Photo Library”.
That’s it. All the photos saved in the iCloud account will be downloaded on your new device and you’ll be able to access them without any hassle. So this was how to transfer pictures from iphone to iphone using iCoud wirelessly. Following is a yet another way to serve your purpse.
Way 3: Transfer Photos from Old iPhone to New iPhone 13 with iTunes
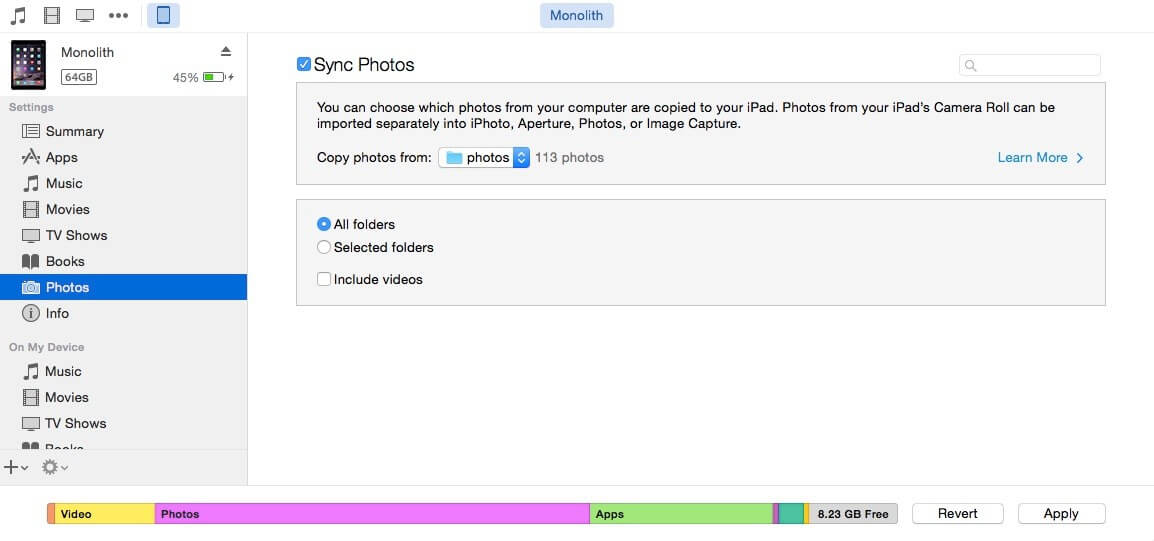
Apart from the iCloud backup, you can also use iTunes to transfer photos from old iPhone to new iPhone 13. To do this, you’ll have to sync your old iPhone’s photos with the iTunes library and then later restore them on the new device. This will be a great way for the people who want to transfer photos from old iPhone to new iPhone without iCloud.
Step 1: Install and launch the latest version of iTunes on your system. Then, connect your old iPhone to the system and wait for it to get detected.

- Step 2: Once the device gets recognized, select the “Photos” tab in the left sidebar.
- Step 3: Now, select the “All Photos and Albums” option and click “Sync” to sync all the photos with the iTunes library.
- Step 4: Now, disconnect your old iPhone from the computer and connect to your new iPhone instead.
- Step 5: Again, wait for the device to get recognized and follow the same steps to enable the “Photos Sync” feature again.
That’s it. All the synced photos will automatically get downloaded on the new iPhone 13 within a few seconds.
Way 4: Transfer Photos from iPhone to iPhone 13 Wirelessly with AirDrop
In case you want to transfer photos to new iphone only in a limited number, you can also use AirDrop to get the job done. If you are a regular iPhone user, you may already be familiar with AirDrop. It’s an exclusive iOS feature that’s specifically tailored to transfer data between two iOS devices. However, since it’s a relatively slow method, you won’t be able to send too many photos through AirDrop.
Here’s how to transfer photos from iPhone to iPhone for free wirelessly using Airdrop.
Step 1: On both iPhones, swipe down on the home screen to launch “Control Center”. Then long-press the “Network Tab” and tap the “Airdrop” icon to enable it on both devices.

- Step 2: On the old iPhone, open the “Photos” app and select the pictures that you want to transfer.
- Step 3: Click the “Share” button and select the iPhone 13 in the “nearby devices” list.
- Step 4: On your iPhone 13, you’ll get a prompt to receive the incoming photos. Just tap the “Accept” button to confirm the action.
Now your iPhone will automatically transfer all the selected photos to the newer device without any other help.
Conclusion
When it comes to transferring pictures from iphone to iphone, you have a plethora of options to choose from. If you already have an iCloud or iTunes backup, you can simply use it to restore the photos on the new iPhone 13. But, if you are looking for a hassle-free and flexible way to transfer photos from iPhone to iPhone 13, make sure to use UltFone iOS Data Manager to get the job done.
Read More:


