Learn How to Transfer Photos from Android to PC
 Jerry Cook
- Updated on 2025-05-29 to Android
For many of you, a piece of photo may hold precious memories. In today's digital world, everyone is more likely to capture an image with their mobile device than a digital camera. When you save photos on your Android device, there are chances of accidental deletion, and you may end up losing photos. Therefore, in case of losing data, it is highly important to copy pictures from Android to PC for backup.
In this guide, you will learn five feasible ways on how to transfer photos from Android to PC. No matter which method you select, you'll surely be able to move the images from Android to PC without compromising their quality.
- Part 1: Recover and Transfer Photos from Android to PC/Mac
- Part 2: Move Pictures from Android to PC using USB Cable
- Part 3: How to Import Photos from Android to PC via Photos on Windows 10/8
- Part 4: Manually Copy Pictures from Android to PC via File Explorer
- Part 5: Transfer photos from Android to PC Wirelessly
Part 1: Recover and Transfer Photos from Android to PC/Mac
UltFone Android Data Recovery is the top recommended Android transfer and recovery software if you accidently deleted photos. The main feature includes:
- Recover deleted photos from Android internal memory and transfer them to computer.
- The photos after transfer don’t have quality loss.
- It recovers data from Android memory without rooting.
- Not only photos, but other types of data are supported like videos, messages, contacts, WhatsApp data, documents, etc.
- Supports 6000+ Android models and all Android OS are supported.
How to Transfer Photos from Android to PC/Mac with UltFone Android Data Recovery
-
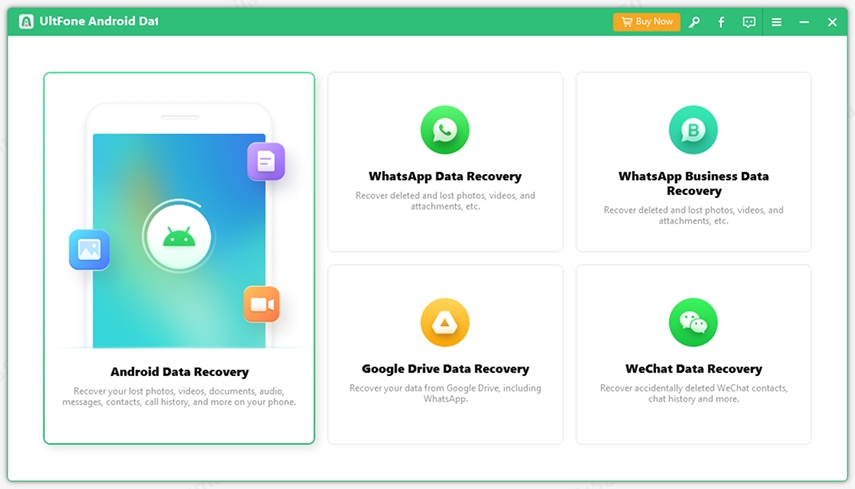
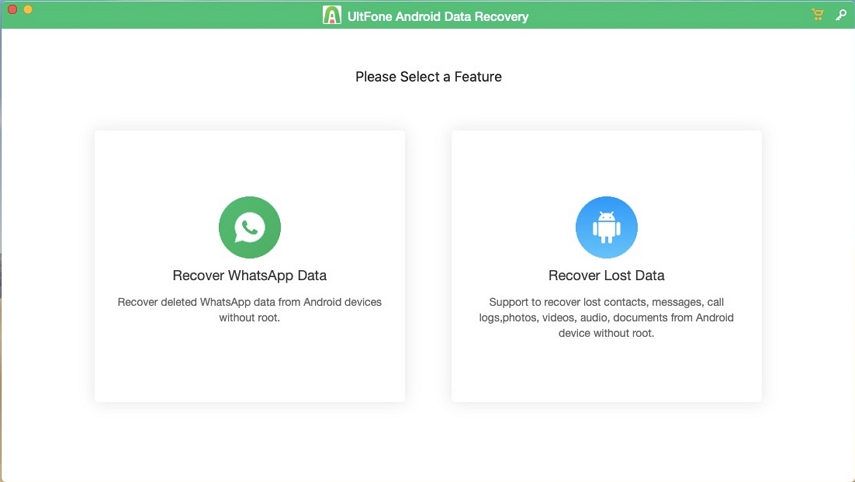
Step 1 Download and launch UltFone Android Data Recovery on your PC or Mac. Here, select “Recover Lost Data” from the main interface.

-
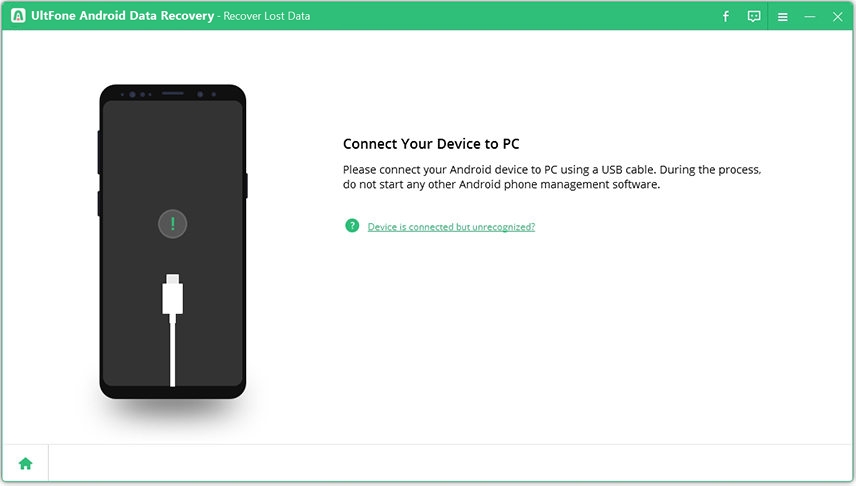
Step 2 Now, connect your Android device to the PC with USB cable. If your phone is not recognized automatically, please follow the onscreen instructions to turn on USB debugging.

-
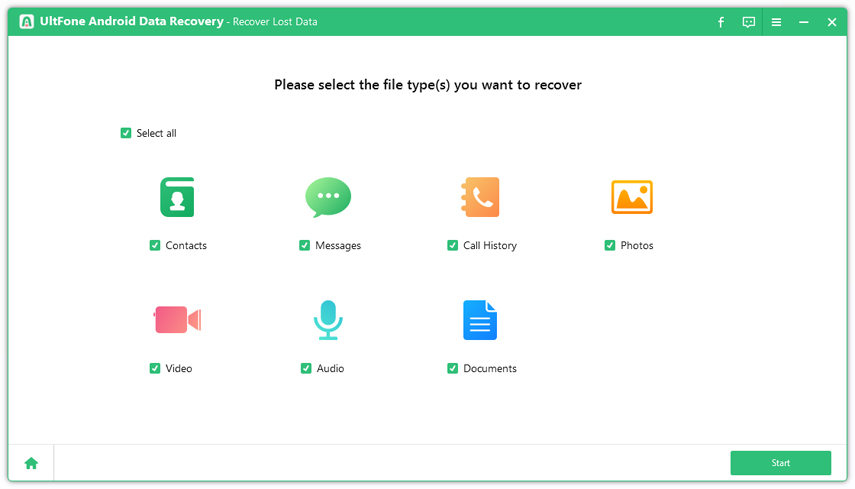
Step 3 Once your device is connected successfully, select the file types (Photos) and hit the “Start” button to start the Android lost data scanning process.

-
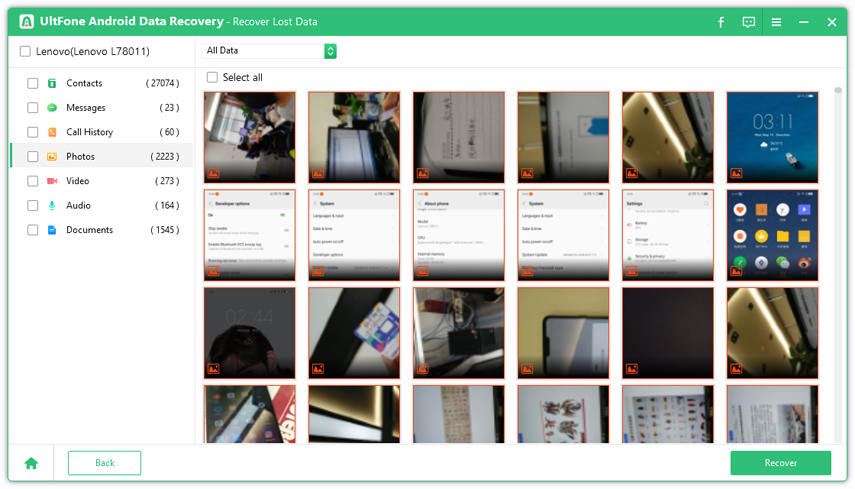
Step 4 After scanning, both deleted and existed data are displayed by categories. Choose Photos from the left panel and you can preview all photos on your device. Select the photo(s) you want to transfer and click Recover button. The selected photo(s) are transferred to computer successfully.

This is one of the easiest methods to recover and transfer photos from Android to PC/Mac.
Part 2: Move Pictures from Android to PC using USB Cable
If you are wondering about how to import photos from Android to PC, then you can easily do so by using a USB cable. Yes, by connecting your Android device to a PC via a USB cable, you can quickly transfer the selected photos from Android to PC and vice versa. This method of transferring photos is hassle and quick. Have a look at how it works!
For better user-readability, the steps are divided separately for Windows and Mac.
Windows Computer:
If you're a Windows user, then follow these steps below to copy photos from Android to Windows 10/8.1/8/7.
- Step 1: Unlock your Android device and connect your device to Windows PC via USB cable.
- Step 2: On your Android device, click on the "Charging this device via USB" notification.
-
Step 3: Under "Use USB for," choose the "File Transfer" option.

- Step 4: Now, a file transfer window will open on your PC. Use this window to drag files.
- Step 5: Once you have completed dragging, eject your Android device from Windows PC and unplug the USB cable.
Mac Computer
If you are a Mac user, then follow the below stated steps to transfer photos from Android to Mac. But make sure that your computer must be using Mac OS X 10.5 and up.
- Step 1: Install and run Android File Transfer on your PC.
- Step 2: Now, unlock your Android phone and connect it to the Mac computer via a USB cable.
- Step 3: On your phone, hit the "Charging this device via USB" notification.
- Step 4: Under "Use USB for," click on the "File Transfer" option.
- Step 5: Now, an Android File Transfer window will open on your Mac computer. Use it to drag files.
- Step 6: Once you are done with transferring the photos, unplug the USB cable.
It was this hassle-free and quick to move photos from Android phone to Windows or Mac PC via a USB cable! Make sure to follow the steps carefully for experiencing desirable results.
Part 3: How to Import Photos from Android to PC via Photos on Windows 10/8
If you are unable to move pictures from Android to PC with any of the methods above, then try transferring them via the Photos app on Windows 8/10. For this, you need to follow the series of steps mentioned below:
Step 1: Firstly, connect your Android phone to your PC by using a USB cable.
Step 2: Unlock your Android device.
Step 3: On your PC, go to the "Start" menu and select "Photos" to open the "Photos App."
Step 4: Here, choose "Import"> "From a USB Device" and then follow the on-screen instructions carefully. Later, you can pick the photos you wish to import and select the location to save the files.

Finally, allow a couple of minutes for detection and transfer.
A few minutes later, the photos will be successfully transferred from Android phone to PC.
Part 4: Manually Copy Pictures from Android to PC via File Explorer
Using File Explorer is another way of transferring photos from an Android phone to a PC. By using this method, you can manually copy pictures from your Android phone to your computer without much hassle. So, here's how to copy pictures from Android to PC via File Explorer!
Step 1: Plug in your Android phone and put it in MTP mode. Now, open "File Explorer" on PC and click on "Find your device."
Step 2: Double-click to open your Android device and open "Internal Shared Storage" or "SD Card Folder."
Step 3: Open the "DCIM" folder and then the "Camera" folder that stores all your Android device's photos. You can also open any other folder to find the photos that you want to transfer.
Step 4: Finally, copy and paste all the photos you need to a folder in which you wish to save the pictures on your PC.

In just a few minutes, you have easily copied the photos from Android to PC via File Explorer!
Part 5: Transfer photos from Android to PC Wirelessly
If the above-mentioned method didn't work to download photos from Android to pc, then you must indeed switch to this method that will help you transfer photos wirelessly. When it comes to how to upload photos from Android to pc wirelessly, the two applications, i.e., Google Drive and Google Photos, tops the list. These two applications come installed on your Android device by default, but if you don't have these applications installed, you can download them from Google Play Store.
Once you have downloaded the applications, you need to follow a series of steps to transfer photos from Android to PC wirelessly.
How to use Google Drive to transfer photos from Android to PC?
Step 1: Open Google Drive and tap on the "+" icon at the bottom right corner of the screen.
Step 2: Now, click on the "Upload" icon and choose "Photos and Videos".

Step 3: Your Gallery will appear now. So, select the photos that you wish to upload.
Step 4: Once you have uploaded the pictures, it's time to download them on PC. For this, follow the following steps.
Step 5: Open your browser and visit Google Drive.
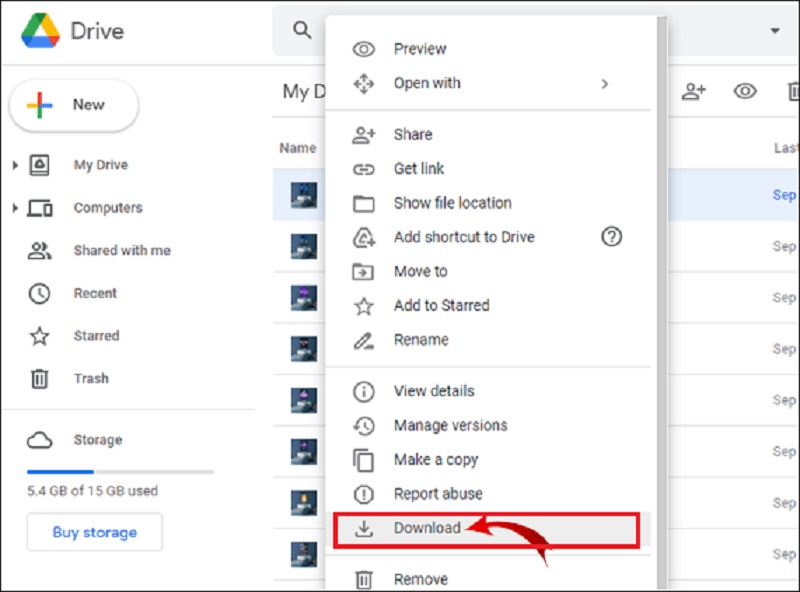
Step 6: Find the folder with uploaded photos, right-click on it and tap on "Download."
How to use Google Photos to transfer photos from Android to PC?
Using Google Photos to transfer photos is easier because all your photos are backed up automatically. You don't need to do anything as pictures are uploaded to Google Photos the moment you capture them.
This feature is "Backup & Sync," and if this feature is turned off, then here's how you can turn it on and transfer photos from Android to PC.
Step 1: Open Google Photos on your Android phone and tap on your profile picture in the upper-right corner of the screen.
Step 2: Go to "Photos Settings" and tap "Backup & Sync."
Step 3: Now, toggle the "Backup & Sync" switch. Once all the photos have been uploaded, it's time to download them on your PC.

Step 4: Open your browser on PC and go to your email.
Step 5: Tap on the "Dial" icon next to your profile picture in the upper right corner.

Step 6: Find "Google Photos" and click on it.

Step 7: Now, open the photo, click on "three-dots" in the upper right corner, and tap on "Download". You have successfully transferred photos from Android phone to PC wirelessly via Google Drive and Google Photos.

The Conclusion
Thus, how to transfer photos from Android to PC is not that challenging as it sounds! You can easily achieve this by using any of the effective workaround mentioned above. But if you are searching for a highly advanced tool that can recover the deleted photos along with transferring to PC, then look no further than the UltFone Android Data Recovery. This amazing tool boasts a handful of unique features that will definitely offer you an amazing android experience. So, what are you waiting for? Install the UltFone Android Data Recovery on your computer now and get ready to recover and transfer photos from your Android device to your PC in just a few minutes.

