Best Disk Drill Alternative for Mac Data Recovery
 Jerry Cook
- Updated on 2019-07-25 to Mac Data Recovery
Disk Drill is a useful data recovery program with both Mac data recovery and data-protection functions. It can easily protect your files from accidental deletion with recovery vault and recover lost data from disks. When your Mac file is deleted, recovery vault makes it possible to recover not only the file itself, but also its properties.
The data-protection feature ensures your data in an extreme safe way which most Mac data recovery program doesn’t have such feature and this is free in basic version. The trial version of the program allows you find lost files before you purchase it.
However, Disk Drill also has deficiencies that dissatisfy users.
1. Both existed files and lost files are listed in one catalogue after scanning. It’ll cost some time to find what you really want to restore.
2. The scan speed is time consuming.
3. It can’t partition, defragment, or maintain your hard drive, while other data recovery programs do have these abilities.
4. The pro version costs $90. This price may seem steep to certain users.
Since Disk Drill can’t function well, I’d like to present the best alternative of Disk Drill for Mac data recovery, that’s UltFone Mac Data Recovery.
Windows Data Recovery for Mac is the professional and easy-to-use Mac data recovery software. It is helpful to recover ost photos, videos, music, documents, Emails and other files from Mac hard drive and other Mac-compatible devices including SD card, USB drive, digital camera, mobile phone, external media storage, etc. In addition, this wise Disk Drill alternative for Mac covers a wide range of data loss scenarios, including file deletion and corruption, reformatted, alter, or corrupt partition, and other reasons. The top alternative of Disk Drill fully supports Mac OS X 10.11 EI Capitan, 10.10 Yosemite, 10.9 Mavericks, 10.8, 10.7, 10.6, 10.5 and lower.
How to Use UltFone Mac Data Recovery -- Disk Drill Alternative for Mac OS X
To better restore lost files on MacBook, follow the tutorial below and learn how to use UltFone Mac Data Recovery.
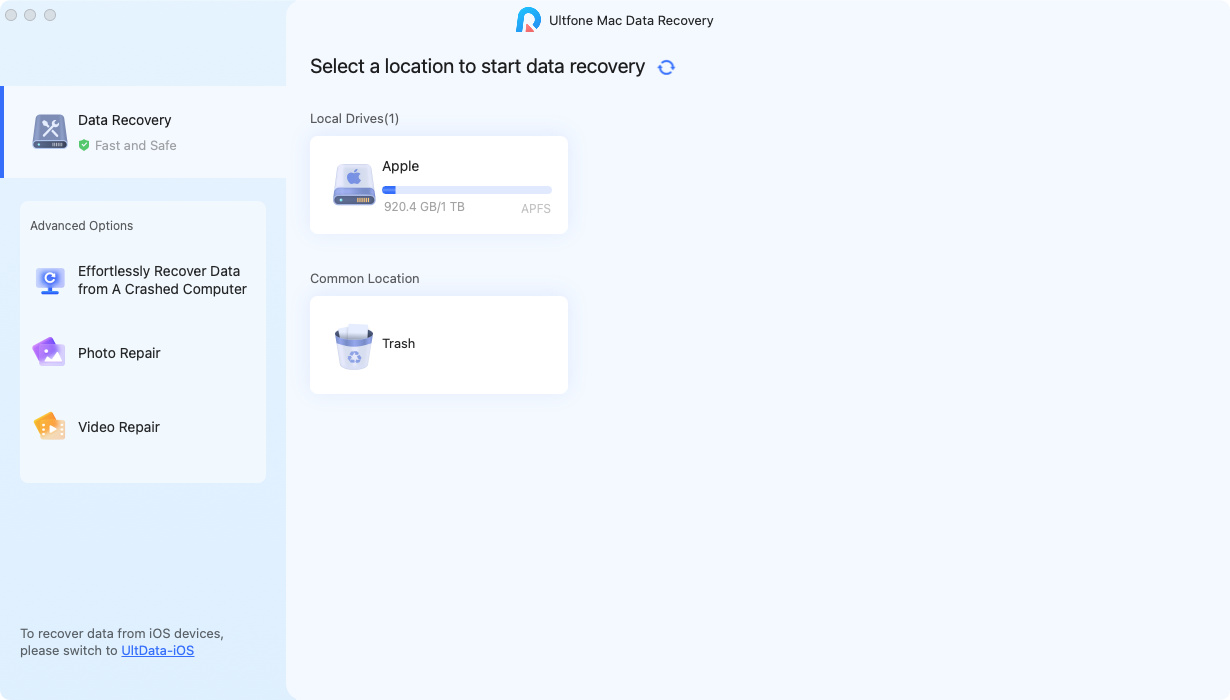
Download, install and run UltFone Mac Data Recovery
Step 1: Select the types of files you are to restore and click on Next to proceed to.
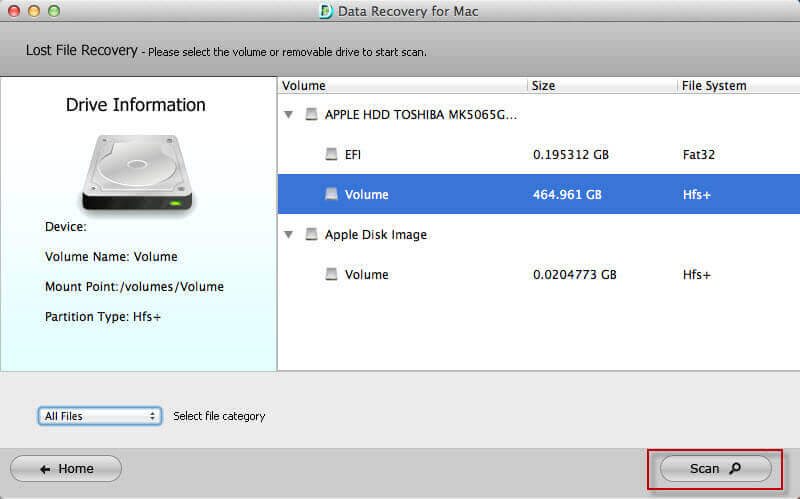
Step 2: Select the volume where your lost files located. And then click "Scan" to start scanning.

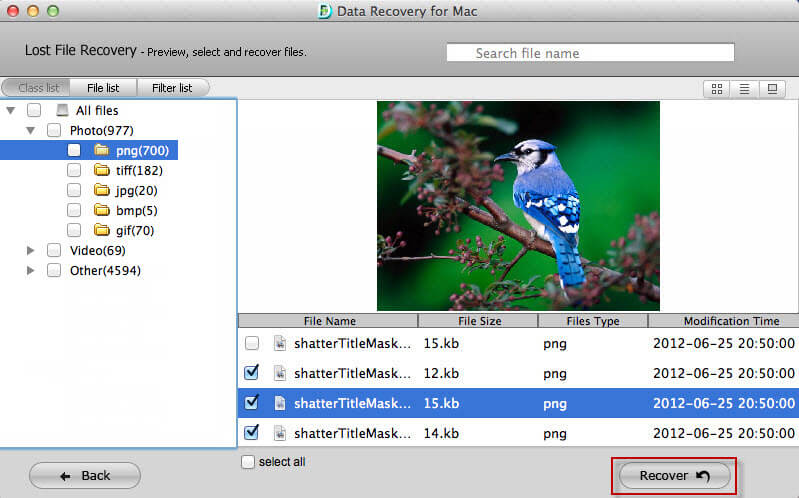
Step 3: After scan finished, all the recoverable files are displayed by file type and file path. Select the files you need to recover and then click "Recover" to get back the lost files. Before recovery, you are allowed to preview photos and audios.
Step 4: Specify a location to save the recovered files. It's forbidden to save them to the volume where your lost files stored before.
Done! With these 4 easy steps of Mac OS X data recovery, you will have your lost files back! Just free download UltFone Mac Data Recovery! Click here to get more advice about data recovery on Mac.


