How to Jailbreak iOS Device on Windows
To bypass iCloud activation lock on iOS devices, you need to jailbreak this iOS device first. Since there is no jailbreak tool for Windows, you can follow this tutorial to create a jailbreak environment on Windows computer and then jailbreak your iOS device.
Part 1. Preparation for Jailbreaking iOS Device on Windows System
To jailbreak iOS device on Windows, please do the following preparations:
- The computer is running Windows 7 or later, both 32 and 64 bit are supported.
- USB flash drive with more than 2GB storage. (The USB drive will be formatted, please back up important data beforehand)
- Download checkn1x-1.0.6-amd64.iso on Windows computer.
- Download rufus-3.1.2.exe on Windows computer.
Part 2. Step by Step Guide on How to Jaibreak an iOS Device on Windows Computer
Phase 1. Burn the checkn1x image file to the USB flash drive
Step 1. Insert your USB drive to computer.
Step 2. Download the executable file Rufus and run it. There is no installation process as the application is ready to use once downloaded.
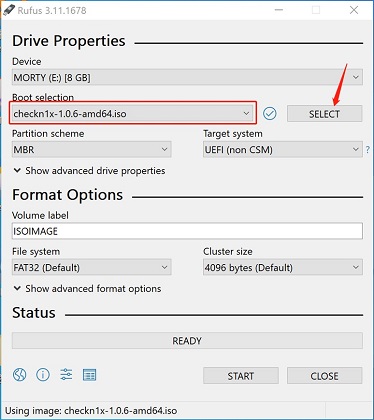
Step 3. On the Rufus, click the SELECT button and find the checkn1x image you've just downloaded. After that, the "checkn1x-1.0.6-amd64.ios" file will appear in the boot selection. Keep the other options default and click START button.
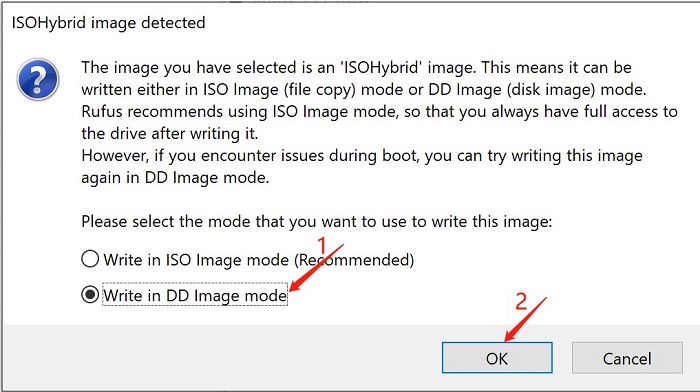
Step 4. Rufus will prompt a warning alert, please select “Write in DD Image mode” from the options and then click OK to proceed.
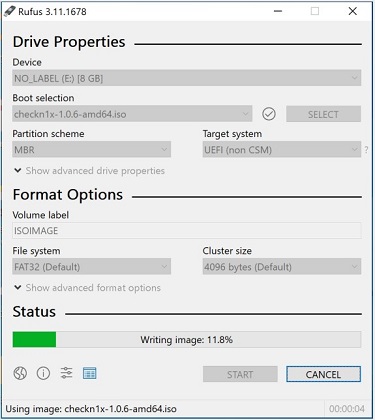
Step 5. Rufus will start burning the checkn1x image file to the USB flash drive. It may take 2-3 minutes around, please wait for the process to complete.
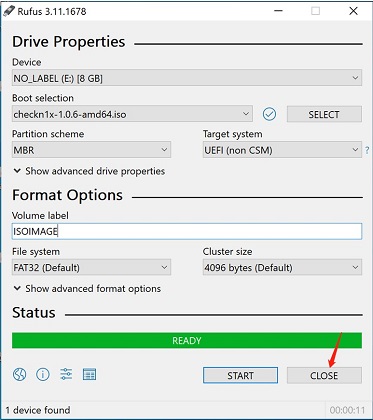
Step 6. After the process is completed, click CLOSE button to exit.
Note:
Please eject and re-plug the USB flash after creating checkn1x image file in case it becomes unrecognized.
Phase 2. Use the created checkn1x to jailbreak iOS device
Step 1. Restart your computer. When the computer is powered on and loaded, press F12 shortcut key to enter Boot Options.
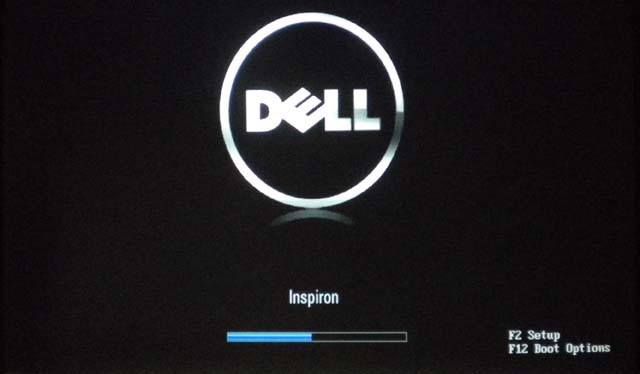
For most computer brands, you can press F12 to enter Boot Options. And if F12 does not work, you can search for the corresponding hot key that matches with your brand to enter BIOS. Generally speaking, when you start the computer, you'll see a reminder on the screen that says which hot key to press to enter the BIOS.
| Boot Menu Key | Desktop Brand | Laptop Brand | Motherboard Brand |
|---|---|---|---|
| ESC | Dell | ASUS, Sony | MAXSUN, UNIKA, SUPOX, Spark, SOYO, EPOX, UNIKA, Jetway, J&W, Colorful, ECS, SOYO, FOXCONN |
| F8 | ASUS, BenQ | ASUS, YESTON, J&W | |
| F9 | HP, BenQ | BIOSTAR, GUANMING | |
| F10 | ASL | ||
| F11 | MSI | MSI, ASRock, ONDA, Colorful,ECS, Gamen, Topstar | |
| F12 | Lenovo, HP, Acer, Hasee, eFound, THTF, Haier | Thinkpad, Dell, Lenovo, TOSHIBA, Samsung, IBM, Acer, Hasee, Haier,eFound, THTF, GIGABYTE, Gateway, eMachines | GIGABYTE, Intel, Cthim, SOYO, FOXCONN, Gamen, Topstar |
If your computer is unable to enter the "Boot Menu" using hot key, try entering the COMPUTER BIOS/UEFI and modify the system Boot Entry Settings to enter the Linux checkra1n environment. Below are the detailed guides:
- BIOS/UEFI Settings:How to Boot Your Computer from USB/CD/DVD
- Windows Tutorial: How to Boot A Compute from USB/CD/DVD
Step 2. In the Boot Options window, please select the USB flash where the checkn1x image file was just burned.
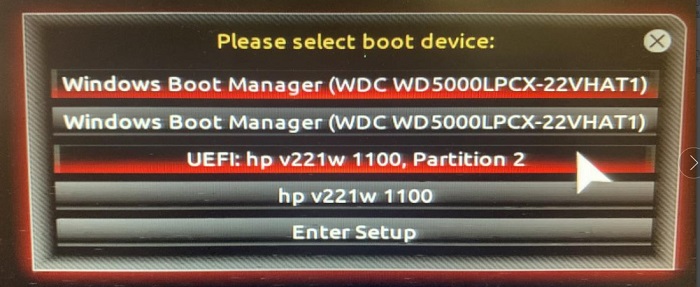
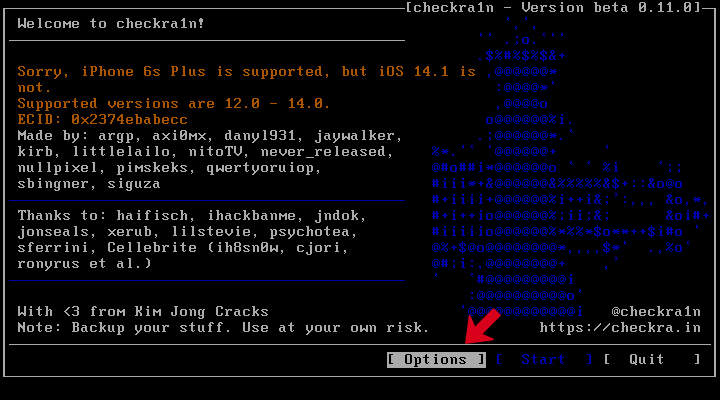
Step 3. After the checkn1x tool is successfully booted, please connect your iOS device to the computer via a USB cable and use keyboard arrow keys to select the "Options". Then press Enter key to set the jailbreak tool.
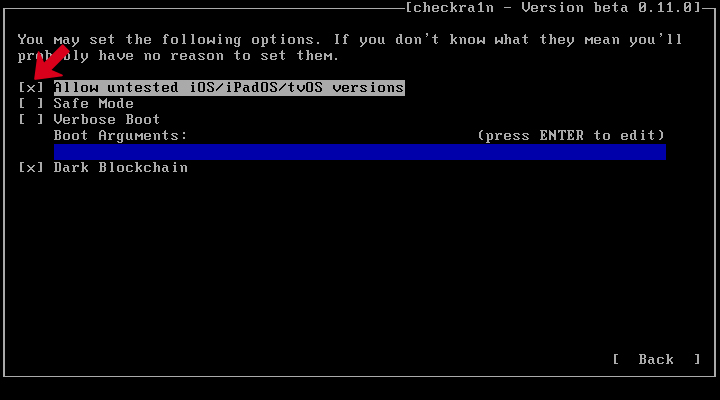
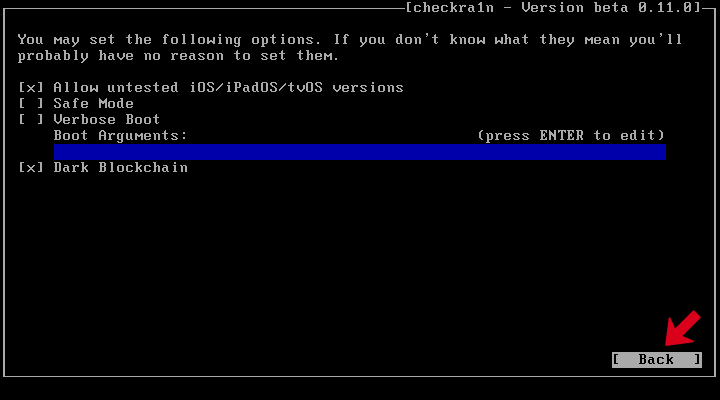
Step 4. On the Settings screen, select Allow untested iOS/iPadOS/tvOS versions option using the keyboard arrow keys, and press Enter to proceed.
Step 5. Choose the Back button and go back to the main interface.
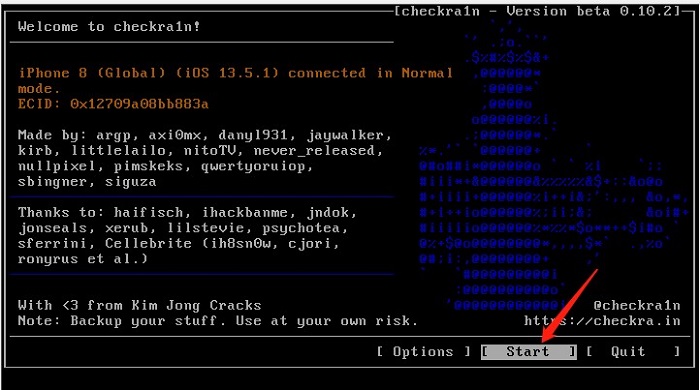
Step 6. This time, select the "Start" option, and press the Enter key to start jailbreaking the device.
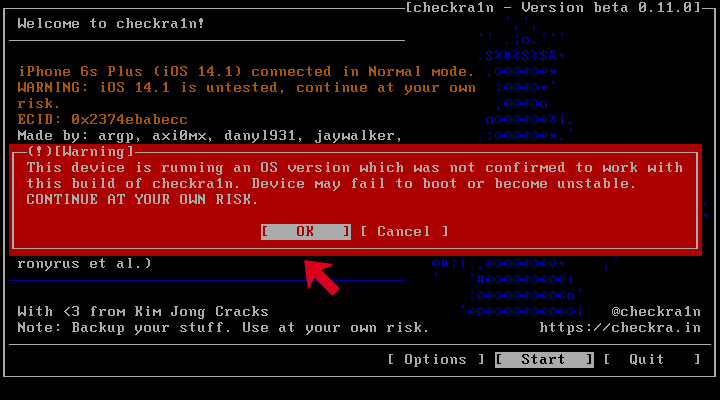
Step 7. Confirm your decision in the pop-up window.
Step 8. The device needs to be put into DFU mode to apply the jailbreak. This program will guide you through this. Click Next button to continue.
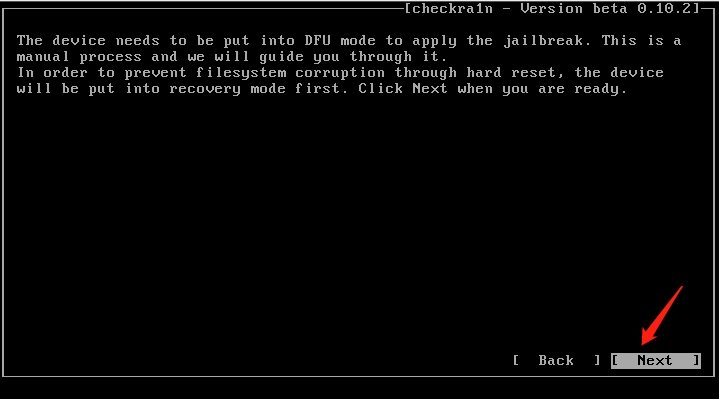
Step 9. After you click Next button, checkn1x will put your device into recovery mode first.
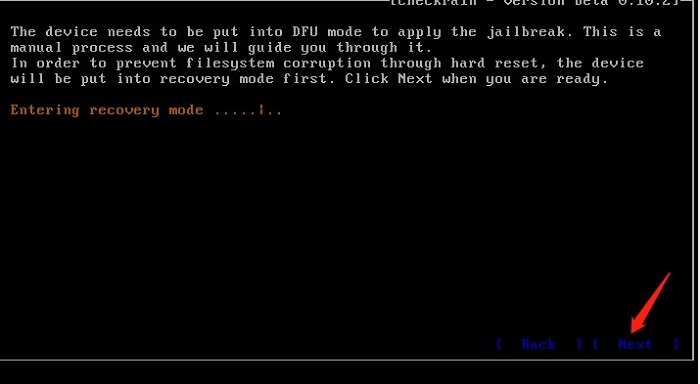
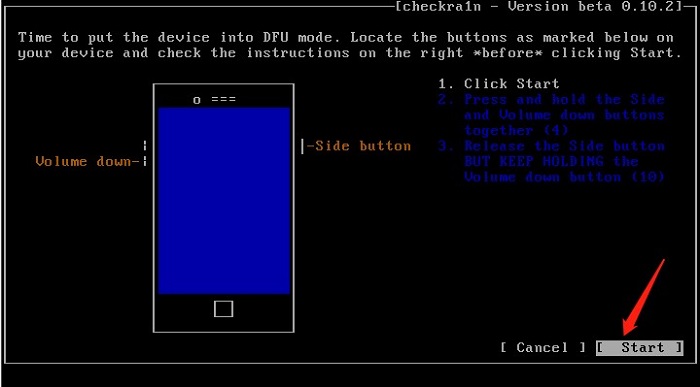
Step 10. Once the device is in recovery mode, you should read the onscreen instructions carefully before clicking Start. When you are sure you have known the operations, click Strat button and manually put your device in DFU mode.
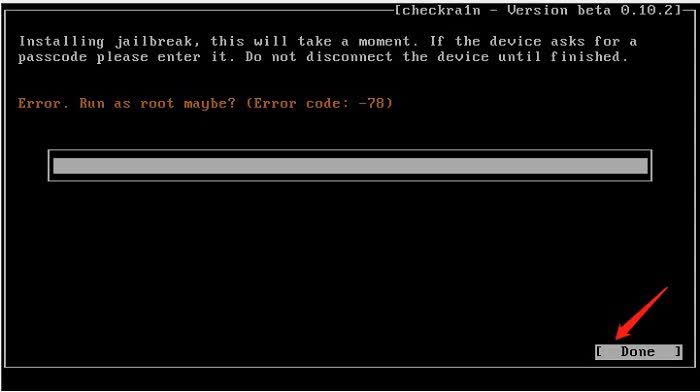
Step 11. Once the device is in DFU mode, checkn1x will start to jailbreak your device automatically. It will take a moment. If the device asks for a passcode please enter it. Just don't disconnect the device until the jailbreak is finished. Click Done when the process completed.
Tips:
1. If the jailbreak process gets stuck, you can try the following methods:
- Use another USB flash drive and repeat the steps.
- Restart the computer and iOS device to try again.
2. If the jailbreak fails, please connect the iOS device to the rear USB port of the computer, and then try the jailbreak process again. Usually the rear USB port has better compatibility.
Part 3. Remove iCoud activation lock on iPhone/iPad/iPod touch
After the jailbreak is successful, restart the computer and your computer will automatically enter the Windows operating system. You can now use UltFone Activation Unlock to remove iCloud activation lock. Here is the step by step guide.
